A dedicated forum and online store for the Opae ula shrimp!
How to setup an Opae ula tank.
Page Index:
• RO/Distilled/Bottled water
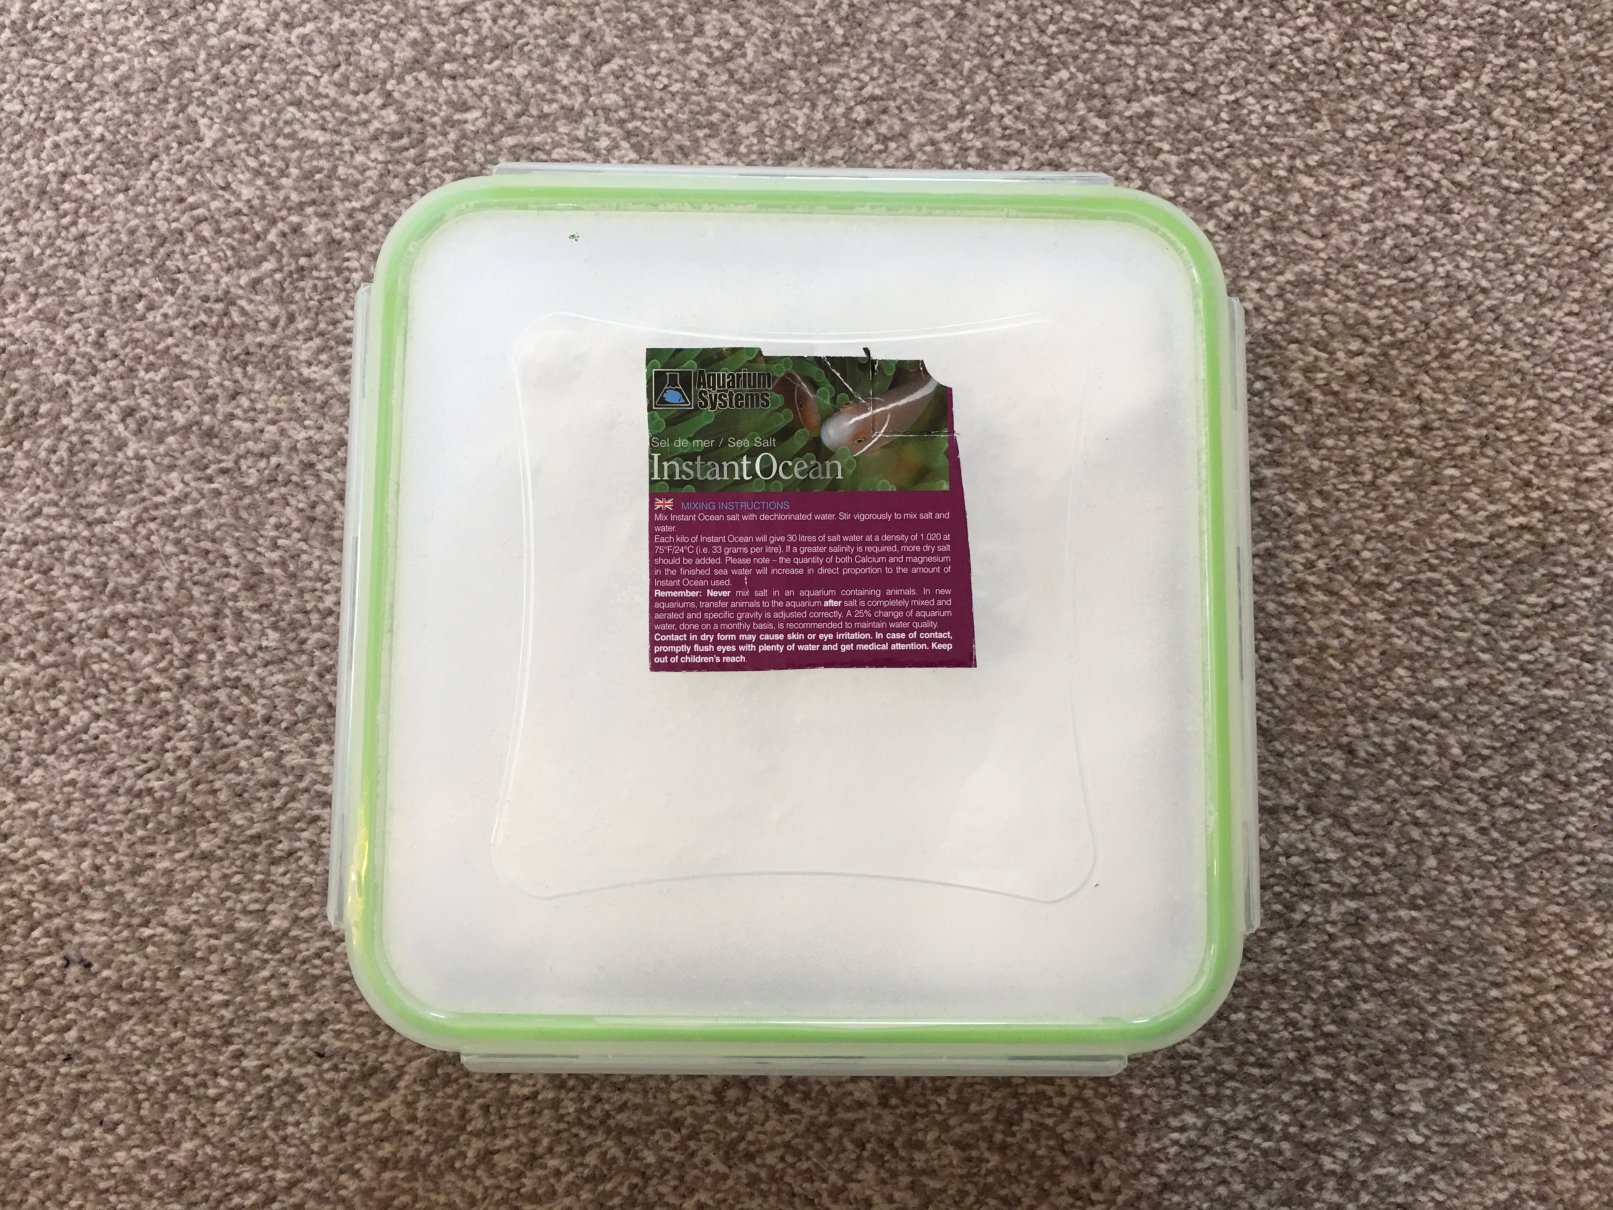
• Marine salt
• Substrate (sand, gravel, crushed coral) NO live sand
• Rock scape/ornament caves etc.. (Rocks should be ocean rock or lava rock) NO live rock
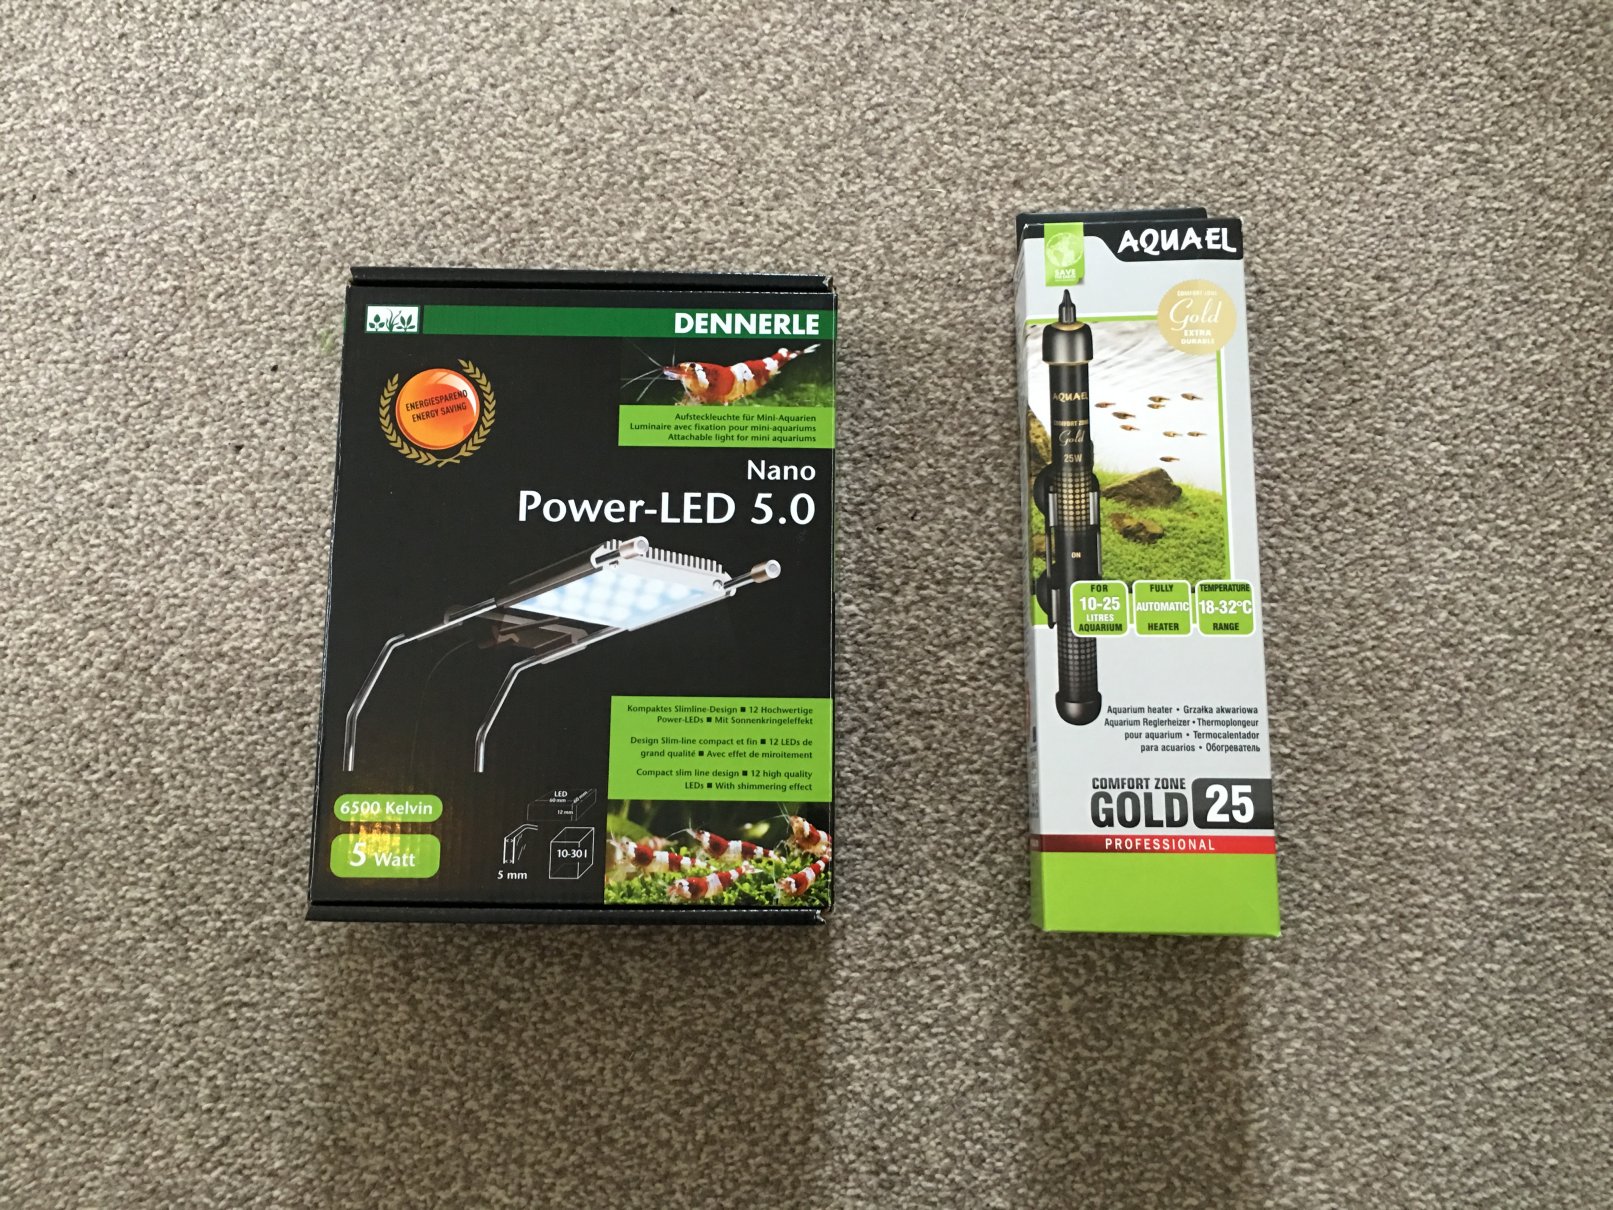
• Tank light
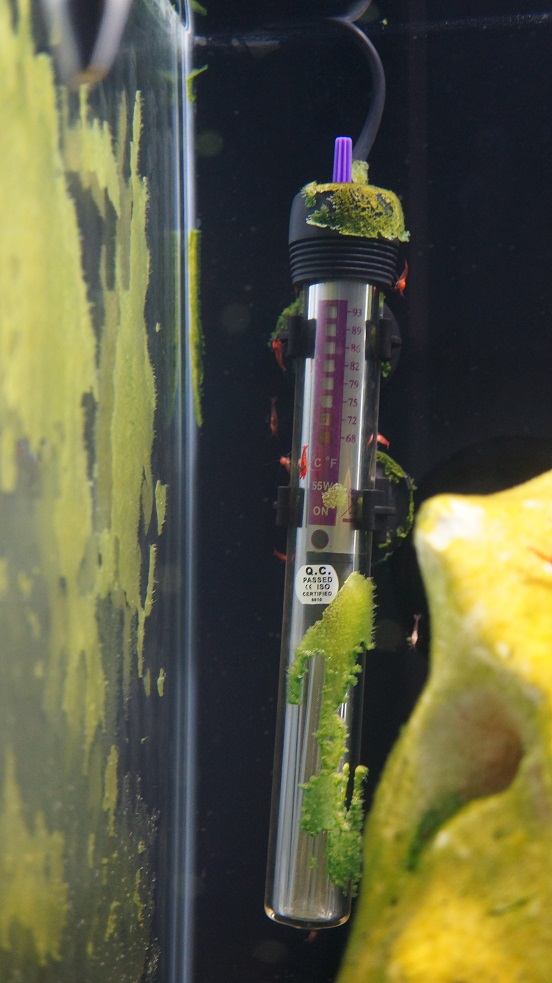
• Heater (1 Watt rating per litre of your tank minimum)
• Thermometer.
• Calcium carbonate block (only required if you don't use ocean rock OR crushed coral substrate in your tank)
• Light diffuser/egg crate (tank safe)
• Thermometer
• Salt water liquid master test kit
• Plug timer for lights (automated switching on and off)
• Plastic net (small size with no metal parts)
• Glass feeding dish/bowl
• Water additives (Prodibio Biodigest)
• Algae scraper/magnet (no metal parts)
• TDS pen (for checking RO water purity when purchased from your LFS)
• Notepad to log water parameters over cycling stage • A water storage container - For storing your fresh RO/Distilled/Bottled water to be used for tank topoffs during evaporation loss.
• Bucket - (Preferably all plastic to avoid rust from salt contact) for mixing your brackish water.
The last set of items on the list MAY be optional but these substantially speed up and provide a healthy environment, positively influence breeding, longevity of life and promote nice deep coloured shrimp (healthy shrimp are happy shrimp!) Most fish tank heaters have a built in thermostat so they switch on and off when they detect the water drop below or rise above the set temperatures, I wouldn't want my tank to drop below 17 Deg C and the winters here in the UK can drop below freezing which heavily influences the room they are located in.
The Calcium carbonate blocks are there to buffer your tanks water and stop it becoming too acidic(PH) over time. If you use a crushed coral substrate or ocean rock for your rock scape you get the PH buffering effect that the calcium carbonate blocks would provide automatically. This means you don't need to purchase the calcium carbonate blocks as this will just be overkill and be a waste of money on your part from doubling up.
I always prefer a cube or cuboid(standard fish tank shape) tank, this lets you have more floor area for substrate and rocks and gives more area for friendly bacteria to live. If you pick a tall tank with a small base area (like a vase) you will be limiting your tank base area for everything you would like to fit into your tank. Be sure to check if you go with a plastic tank/container that the plastic is food grade or similar as some plastics are not suitable for keeping water and shrimp in.
I will quickly mention that if you can buy a 10 litre tank/container as a minimum it will give you a fair amount of water volume which is more forgiving to parameter swings and mistakes, think of it as the higher water volume you have the easier it is to keep your tank healthy, stable and a lot more forgiving to human error. But this isn't a deal breaker so pick which ever size you feel comfy with.
The main points to be aware of that will cause you issues is stress! Stressed shrimp can just suddenly die, become unhealthy and never reproduce. The source of the issue usually stems from;
Direct sunlight will also cause excessive algae growth but more importantly it can heat the water up pretty quickly. The fast temperature fluctuations and excessive heat will stress out the shrimp or kill them.
• Play sand
• Any inert sand
• Crushed coral gravel
• Tank safe aragonite gravel
• Live aragonite (will produce Ammonia from die off)
• Live crushed coral gravel (will produce Ammonia from die off)
• Lavarock
• Any rocks that don't contain traces of metal
• Ceramic
• Tank safe slate (contains no metals)
• Glass
• Rocks (that contain metals)
• Live rock (will flood your tank with ammonia from die off)
• Macroalgae / chaeto
• Marimo balls
• Hair algae aka Angel Hair Moss
• Fish tank heaters and their power cables are designed to be used completely underwater so don't be worried about having wires or cables touching water!
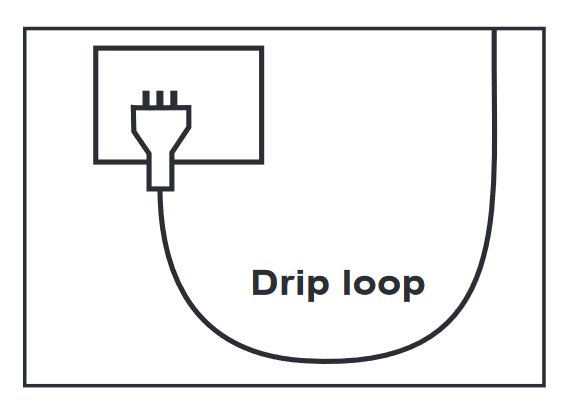
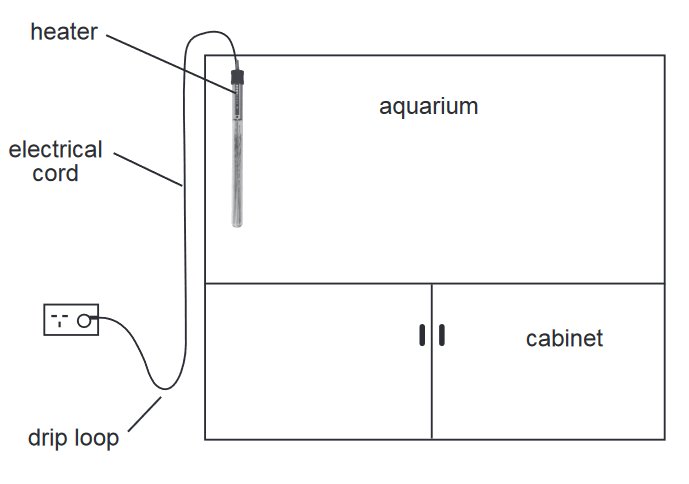
• Another important safety feature to be used with cables is something called a 'drip loop' and this stops any escaped water from running down any cables and making any contact with your plugs/sockets especially when carrying any tank maintenance, this will all be written in the instruction book that ships with your heater but it's worth a mention. This can also be applied to the fish tank lights and its power cable.
See below;
• Be sure to have nice clean hands, wrists and arms during the tank setup. Aftershave and perfume on wrists can often be over looked and you don't want that in your tank water.
• Take a tank or container you wish to use.
• Add your substrate/gravel/sand and the choice of rocks/ornaments.
• Fill the remainder of the tank to the top with your water of choice (bottled, RO, distilled etc), try to take note on the quantity used.
• Add you marine salt, you will need 'roughly' 15 - 20 grams of salt to 1 litre of water used, mix well.
• Add a heater if you need one (If you live in a colder country like EU or the UK), also add your thermometer.
• Setup your tank lighting and be sure to have it switched on 12 hours a day and off 12 hours day.
• Wait for brown and green algae to start growing in your tank which will take a month or two, once this stage is achieved then it is time to add you Opae ula shrimp and snails!
Remember! Keep is simple at all times, the more you mess with the tank the longer it may take to become ready for your new shrimp!
** Be sure to have nice clean hands, wrists and arms during the tank setup. Aftershave and perfume on wrists can often be over looked and you don't want that in your tank water. **
• Take your tank and pour around a half inch of RO water into it, carefully swill the water around the tank to remove any dust or debris, carefully pour the water away when finished.

What equipment should i buy?
What equipment should i buy?
Here is a quick list of items which are required or optional, you may be fine with or without some of them but i have put this list together to help others be aware of what items, tools and options are out there.Required items:
• Tank (preferably with a lid)• RO/Distilled/Bottled water
• Marine salt
• Substrate (sand, gravel, crushed coral) NO live sand
• Rock scape/ornament caves etc.. (Rocks should be ocean rock or lava rock) NO live rock
• Tank light
• Heater (1 Watt rating per litre of your tank minimum)
• Thermometer.
Optional items:
• Hydrometer or Refractometer & calibration solution• Calcium carbonate block (only required if you don't use ocean rock OR crushed coral substrate in your tank)
• Light diffuser/egg crate (tank safe)
• Thermometer
• Salt water liquid master test kit
• Plug timer for lights (automated switching on and off)
• Plastic net (small size with no metal parts)
• Glass feeding dish/bowl
• Water additives (Prodibio Biodigest)
• Algae scraper/magnet (no metal parts)
• TDS pen (for checking RO water purity when purchased from your LFS)
• Notepad to log water parameters over cycling stage • A water storage container - For storing your fresh RO/Distilled/Bottled water to be used for tank topoffs during evaporation loss.
• Bucket - (Preferably all plastic to avoid rust from salt contact) for mixing your brackish water.
The last set of items on the list MAY be optional but these substantially speed up and provide a healthy environment, positively influence breeding, longevity of life and promote nice deep coloured shrimp (healthy shrimp are happy shrimp!) Most fish tank heaters have a built in thermostat so they switch on and off when they detect the water drop below or rise above the set temperatures, I wouldn't want my tank to drop below 17 Deg C and the winters here in the UK can drop below freezing which heavily influences the room they are located in.
The Calcium carbonate blocks are there to buffer your tanks water and stop it becoming too acidic(PH) over time. If you use a crushed coral substrate or ocean rock for your rock scape you get the PH buffering effect that the calcium carbonate blocks would provide automatically. This means you don't need to purchase the calcium carbonate blocks as this will just be overkill and be a waste of money on your part from doubling up.
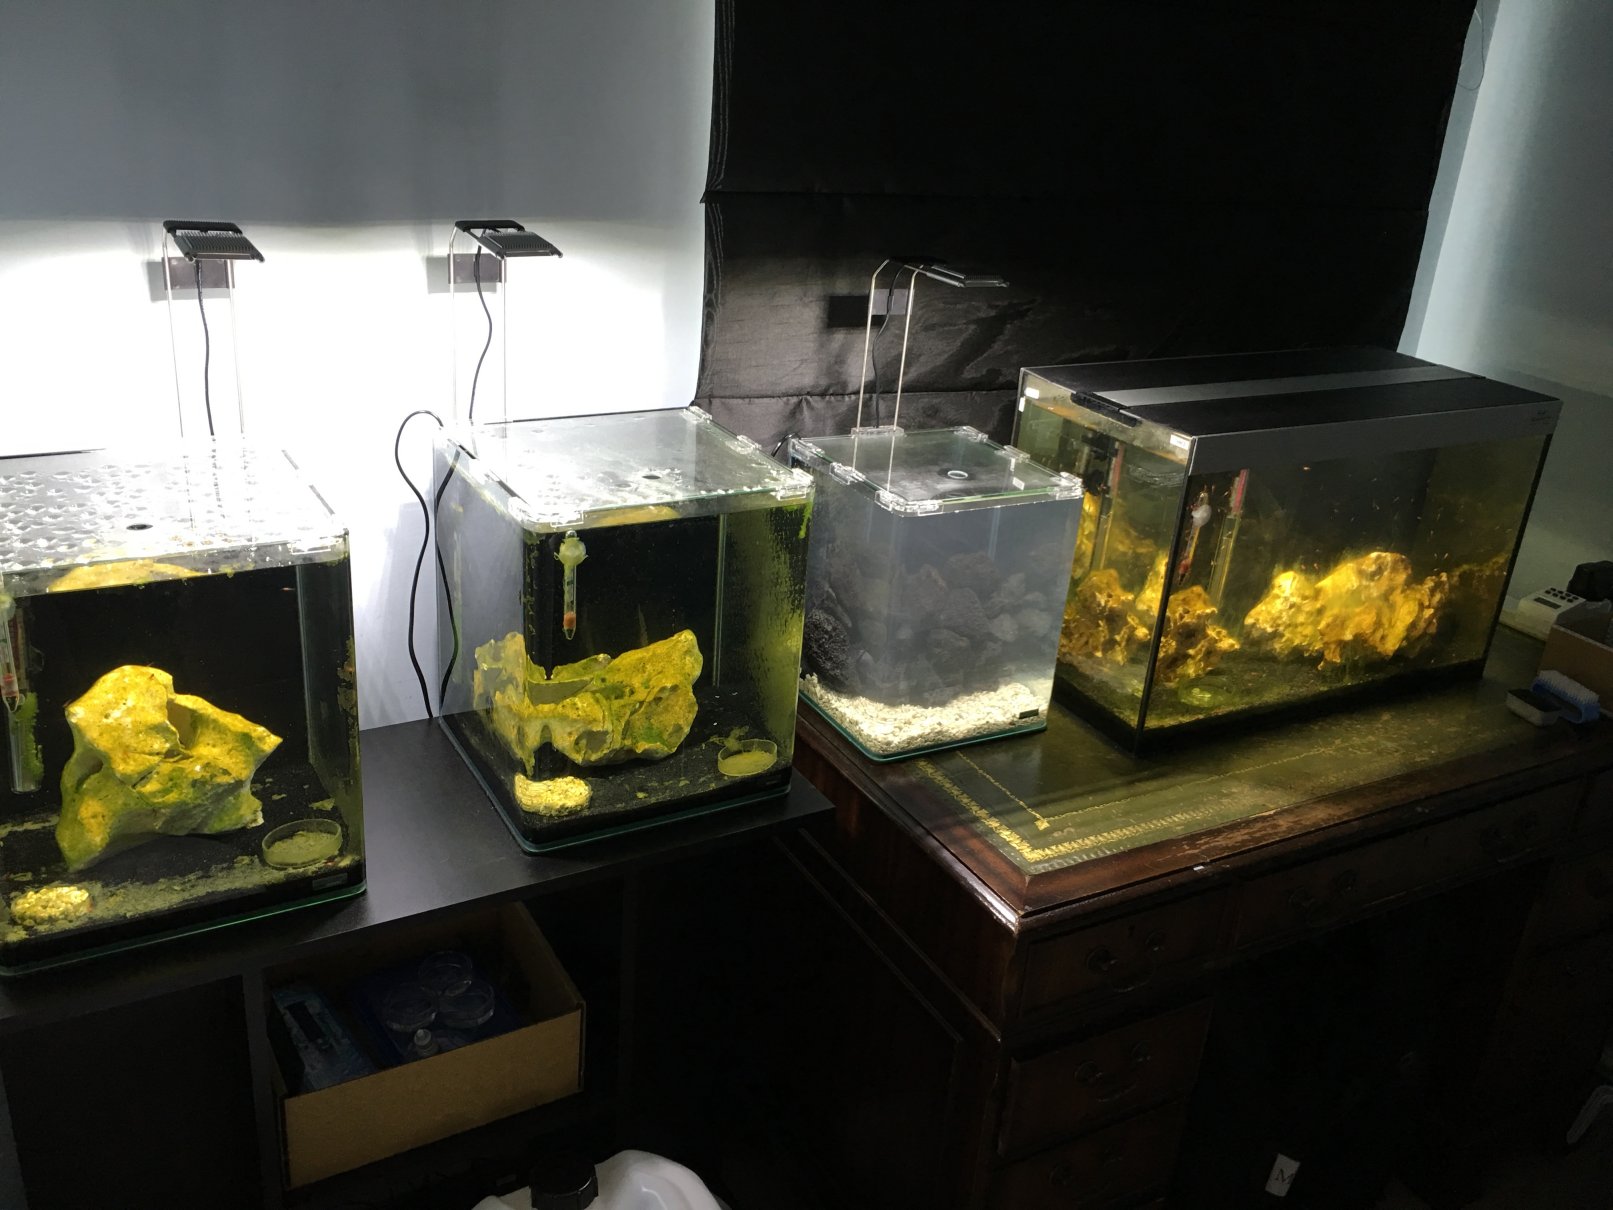
Picking a suitable tank
When it comes to picking a tank or container for your Opae ula shrimp they really aren't fussy at all! As long as you have enough space to provide hiding areas and caves made from your selected rock and you always stay on top of tank water top off's when evaporation comes into play then you can really pick anything to use. A few things to remember are, the more space and water in your tank the easier it will be to keep the water healthy and it will seriously cut down on water becoming fouled by over feeding as you will have more water to dilute what ever is giving off ammonia and will give you a bigger margin of error to play with. Also if you pick a tank that has a good top/lid to it then you wont have to worry about topping off the tank water too often, i have to top off my tanks without a lid every week and my tank with a real lid on only needs a top off once a month.. sometimes not event that! Having a lid also stops dust and dirt falling into the water.I always prefer a cube or cuboid(standard fish tank shape) tank, this lets you have more floor area for substrate and rocks and gives more area for friendly bacteria to live. If you pick a tall tank with a small base area (like a vase) you will be limiting your tank base area for everything you would like to fit into your tank. Be sure to check if you go with a plastic tank/container that the plastic is food grade or similar as some plastics are not suitable for keeping water and shrimp in.
I will quickly mention that if you can buy a 10 litre tank/container as a minimum it will give you a fair amount of water volume which is more forgiving to parameter swings and mistakes, think of it as the higher water volume you have the easier it is to keep your tank healthy, stable and a lot more forgiving to human error. But this isn't a deal breaker so pick which ever size you feel comfy with.
Choosing a location for your tank
So you have decided to setup an Opae ula tank but now need to pick a location in your home suitable for the shrimp tank to live. The beauty of Opae ula shrimp is their over all size and slow reproduction meaning you can have a small tank usually starting from around 3 - 4 litres (around 1 US gallon) and go all the way up to a larger size if you so choose. This means you can place it pretty much anywhere it will fit! On desks, bookshelf's and you don't have to worry about buying a tank stand.The main points to be aware of that will cause you issues is stress! Stressed shrimp can just suddenly die, become unhealthy and never reproduce. The source of the issue usually stems from;
Too much light and direct sunlight
This can lead to an over growth of algae, especially hair algae which at some point may entrap shrimp or larvae if not kept under control. Also this means more tank maintenance for algae removal and disturbing the tank will cause stress.Direct sunlight will also cause excessive algae growth but more importantly it can heat the water up pretty quickly. The fast temperature fluctuations and excessive heat will stress out the shrimp or kill them.
The surrounding environment being too hot or cold
Echoing the point above you need to be aware of temperature fluctuations and extreme temperatures, this means keep the tank away from heaters, fires and radiators or areas that get very cold if you don't use an in tank heater. If the room your tank lives in is very cold all the time then the tanks heater will have to be on constantly which burns extra electricity adding to your fuel bill, rather then flicking on and off for 30 seconds when the heater detects the water cooling down.Keeping the tank away from physical disturbance and noise pollution
If your tank is close to any equipment or for example near washing machines, TV sets, speakers and gym equipment you are going to cause excessive disturbance from vibration which WILL stress the shrimp in your tank resulting in pale shrimps, zero chance of breeding and even death. You don't need to have a public library environment with complete silence but just try and steer your choice of location with psychical disturbance in mind especially if you want to breed the Opae ula shrimp.Keeping the area and room free from air contaminates
This deserves a quick mention as it can be over looked, items like air fresheners, body sprays, hair sprays etc WILL find their way into the tank especially if you have an open top tank or have gaps in or around the lid. If these contaminates are used in the same room as your tank the waters surface will attract them sort of like a 'sponge' This will kill everything in your tank and is very hard to rectify or safe the shrimp. Having your tank near an open window also runs the chance of contaminations entering if you are extremely unlucky.What type of water should i use?
In short, the best water to use in your shrimp tank is Pure RO water, this is cheap to buy and keeps the tank healthy. You can use distilled water or bottled water so long as you definitely know there are no additives or contaminates from the source. If you would like to read more about water quality, testing procedures and everything else health and water related you can read about it in depth Here.Picking a substrate
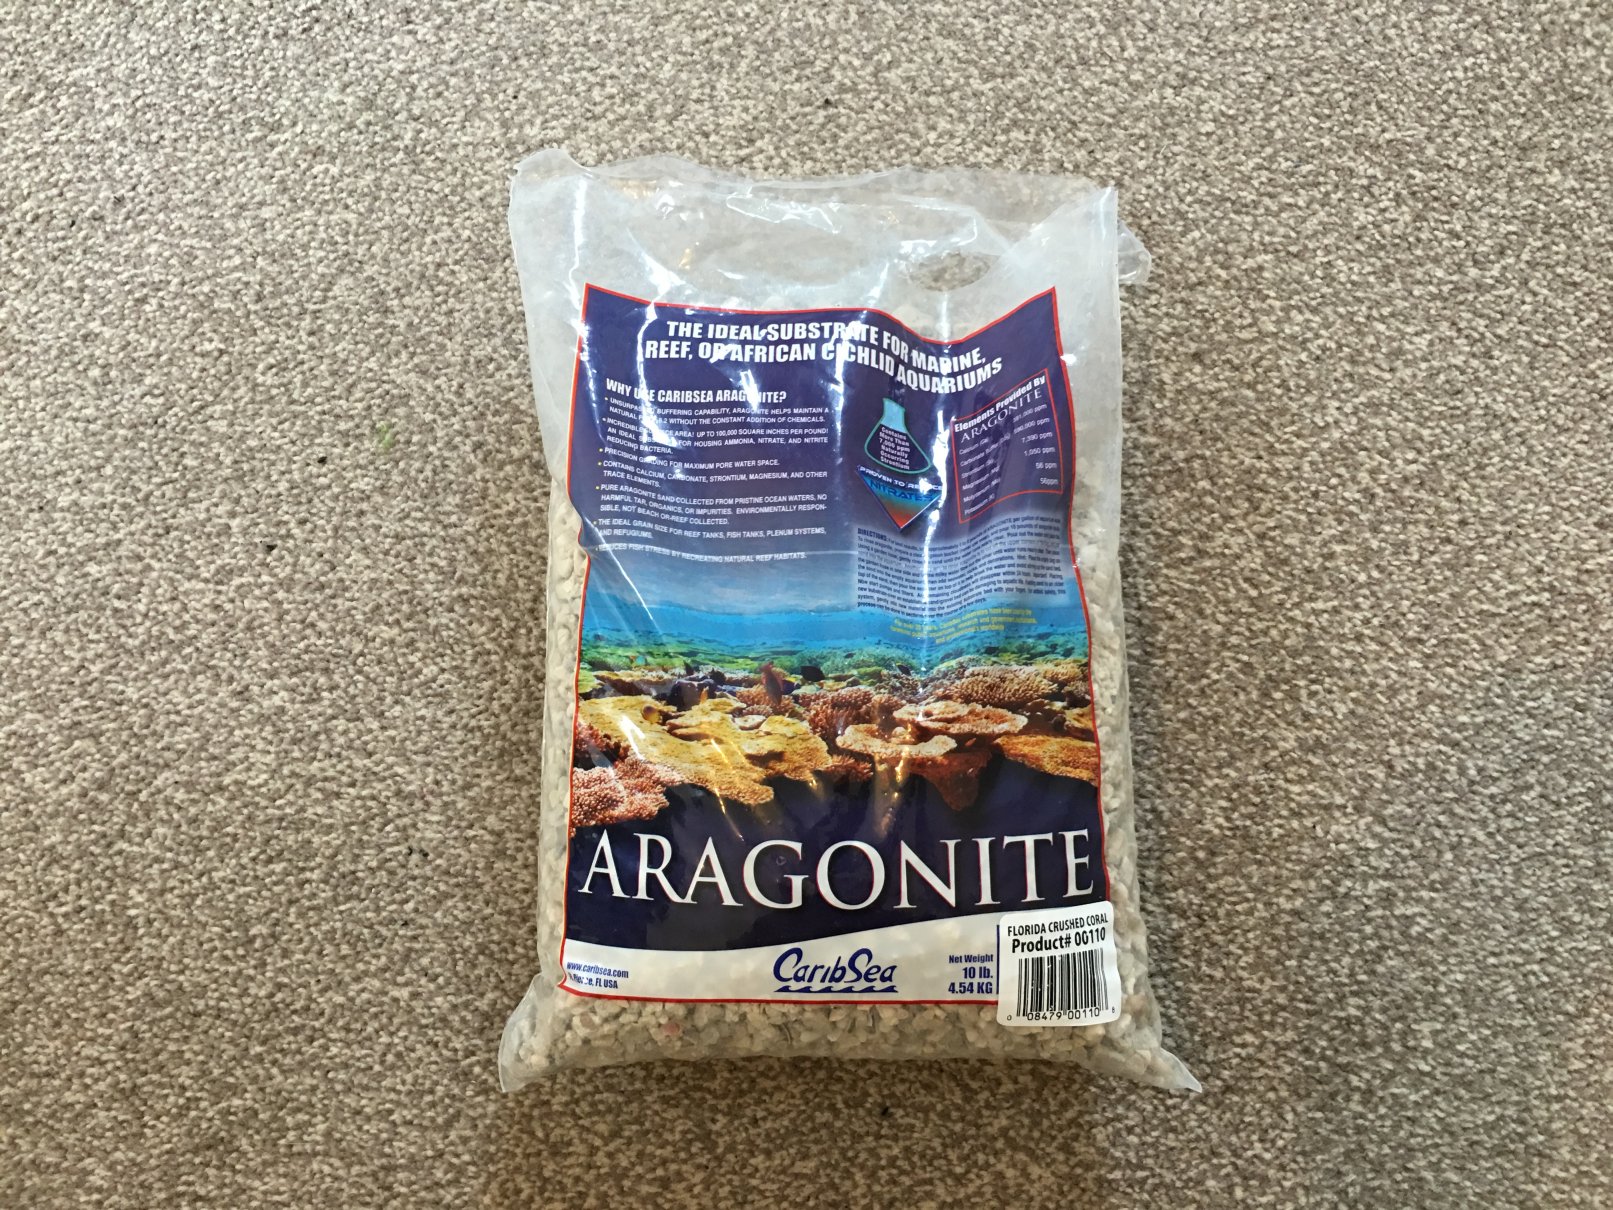
When deciding on a substrate for your Opae ula tank you need to be aware of......Suitable Sands:
• Any inert silica sand• Play sand
• Any inert sand
Suitable Gravels:
• Any inert aquarium gravel• Crushed coral gravel
• Tank safe aragonite gravel
UNsuitable sands and gravels:
• Live sands (will produce Ammonia from die off)• Live aragonite (will produce Ammonia from die off)
• Live crushed coral gravel (will produce Ammonia from die off)
Picking rocks, scapes and ornaments
Suitable rocks:
• Ocean/Texas holey rock• Lavarock
• Any rocks that don't contain traces of metal
Suitable ornaments:
• Resin/Plastic/Acrylic• Ceramic
• Tank safe slate (contains no metals)
• Glass
UNsuitable rocks and ornaments:
• Wood (this reduces your waters pH)• Rocks (that contain metals)
• Live rock (will flood your tank with ammonia from die off)
Suitable brackish plants
As long as your buy plants that have been purposely adapted to brackish water you will not get the plants dying off and spoiling your tank water, here are a few that are great for starting out:• Macroalgae / chaeto
• Marimo balls
• Hair algae aka Angel Hair Moss
Important notes
• DO NOT plug in or switch on your heater when its out of water as this will instantly break it beyond repair, the same apply's when removing water from your tank during a water change etc. If you forget to switch off the heater and your water level drops and exposes the heater to the air it will break.• Fish tank heaters and their power cables are designed to be used completely underwater so don't be worried about having wires or cables touching water!
• Another important safety feature to be used with cables is something called a 'drip loop' and this stops any escaped water from running down any cables and making any contact with your plugs/sockets especially when carrying any tank maintenance, this will all be written in the instruction book that ships with your heater but it's worth a mention. This can also be applied to the fish tank lights and its power cable.
See below;
A quick setup guide
When setting up an Opae ula tank you can make it as simple or 'all bases covered' as you wish, I have added a full in depth setup guide HERE with step by step instructions that provides a more in depth approach to setting up a tank of your own. How ever if you want a quick setup follow the guide below!• Be sure to have nice clean hands, wrists and arms during the tank setup. Aftershave and perfume on wrists can often be over looked and you don't want that in your tank water.
• Take a tank or container you wish to use.
• Add your substrate/gravel/sand and the choice of rocks/ornaments.
• Fill the remainder of the tank to the top with your water of choice (bottled, RO, distilled etc), try to take note on the quantity used.
• Add you marine salt, you will need 'roughly' 15 - 20 grams of salt to 1 litre of water used, mix well.
• Add a heater if you need one (If you live in a colder country like EU or the UK), also add your thermometer.
• Setup your tank lighting and be sure to have it switched on 12 hours a day and off 12 hours day.
• Wait for brown and green algae to start growing in your tank which will take a month or two, once this stage is achieved then it is time to add you Opae ula shrimp and snails!
Remember! Keep is simple at all times, the more you mess with the tank the longer it may take to become ready for your new shrimp!
Full step-by-step setup guide
Click on the step section you wish to view below for the individual steps/instruction.• Take your tank and pour around a half inch of RO water into it, carefully swill the water around the tank to remove any dust or debris, carefully pour the water away when finished.
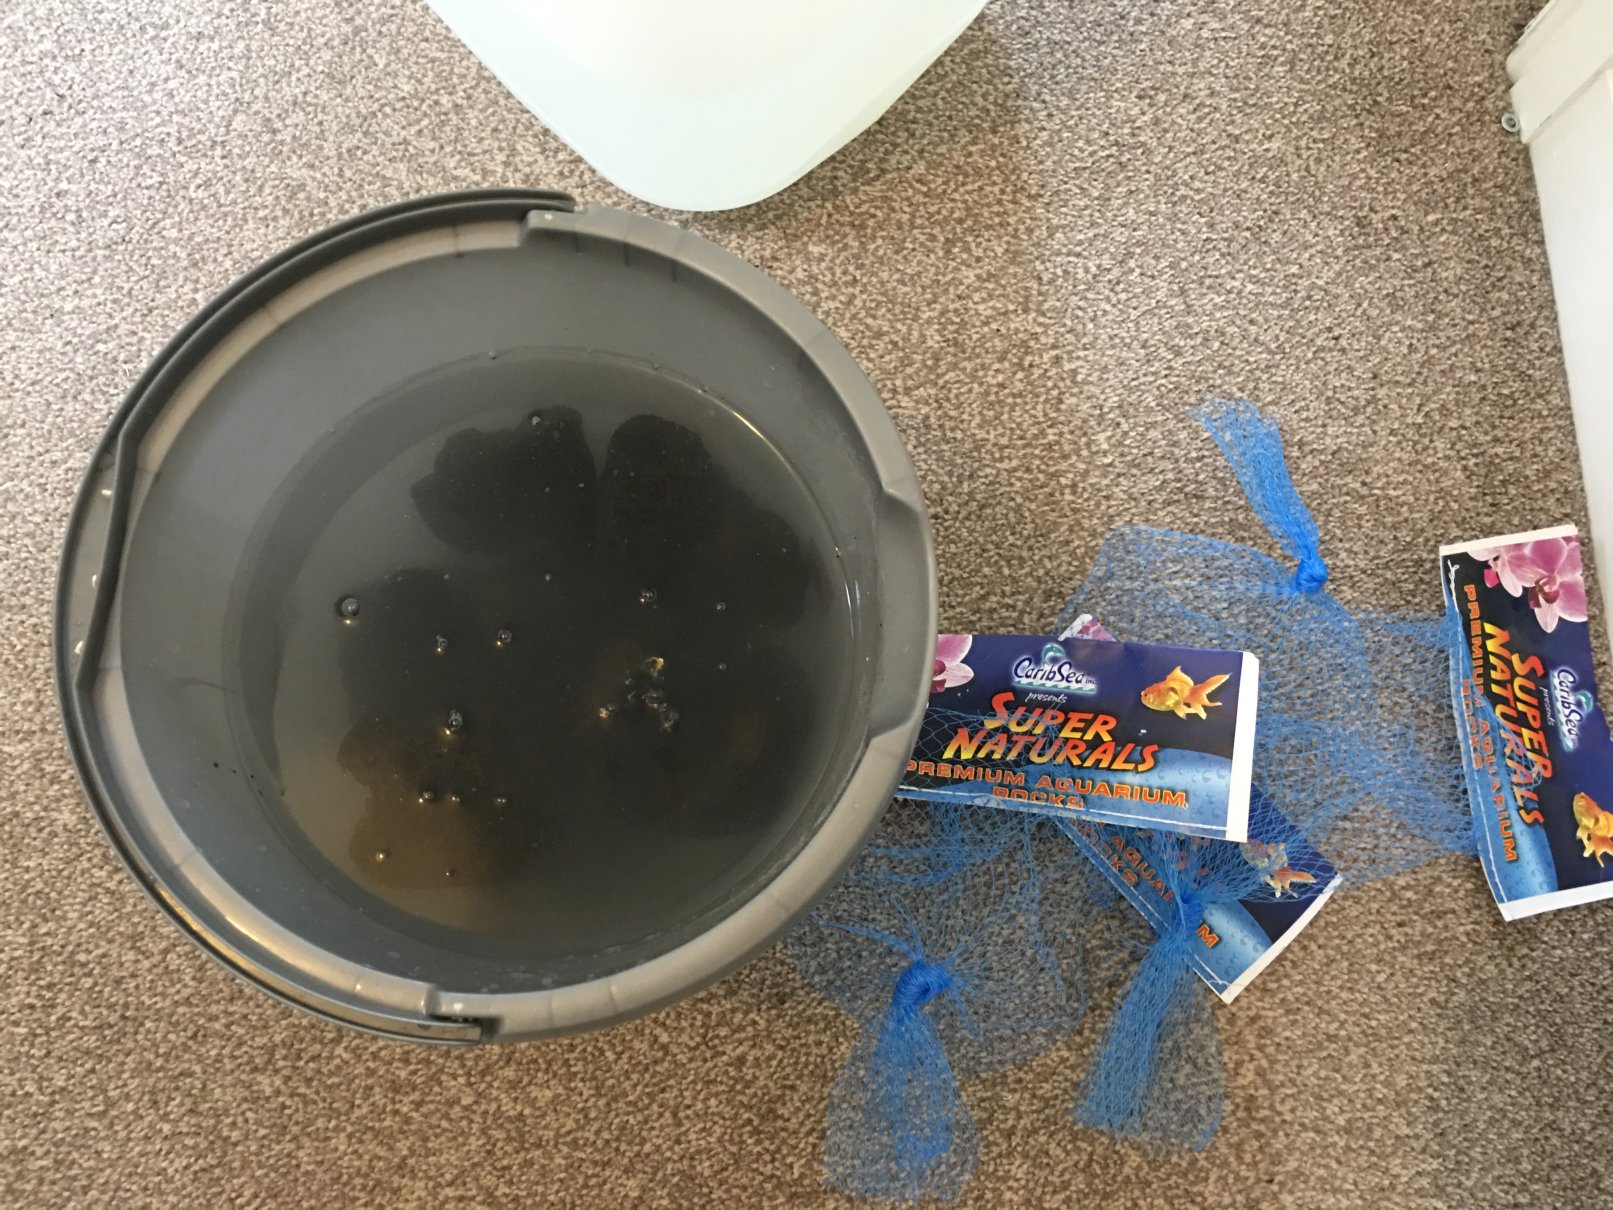
• Take your bucket and pour in the required amount of substrate you wish to use, between 1cm to 2cm (half inch to just under an inch) coverage of your tanks base works best. Pour in RO water which should cover the substrate in the bucket by about an inch and start to swill and stir your hand around in the substrate, this cleans and removes and dust, dirt and debris. By removing this you will get clearer water quicker and in the future if you disturb the substrate in your tank during maintenance it won't kick up dusty water. Once satisfied pour away the RO water and repeat this step until you are happy with the cleanliness of the water you are pouring away after the wash.
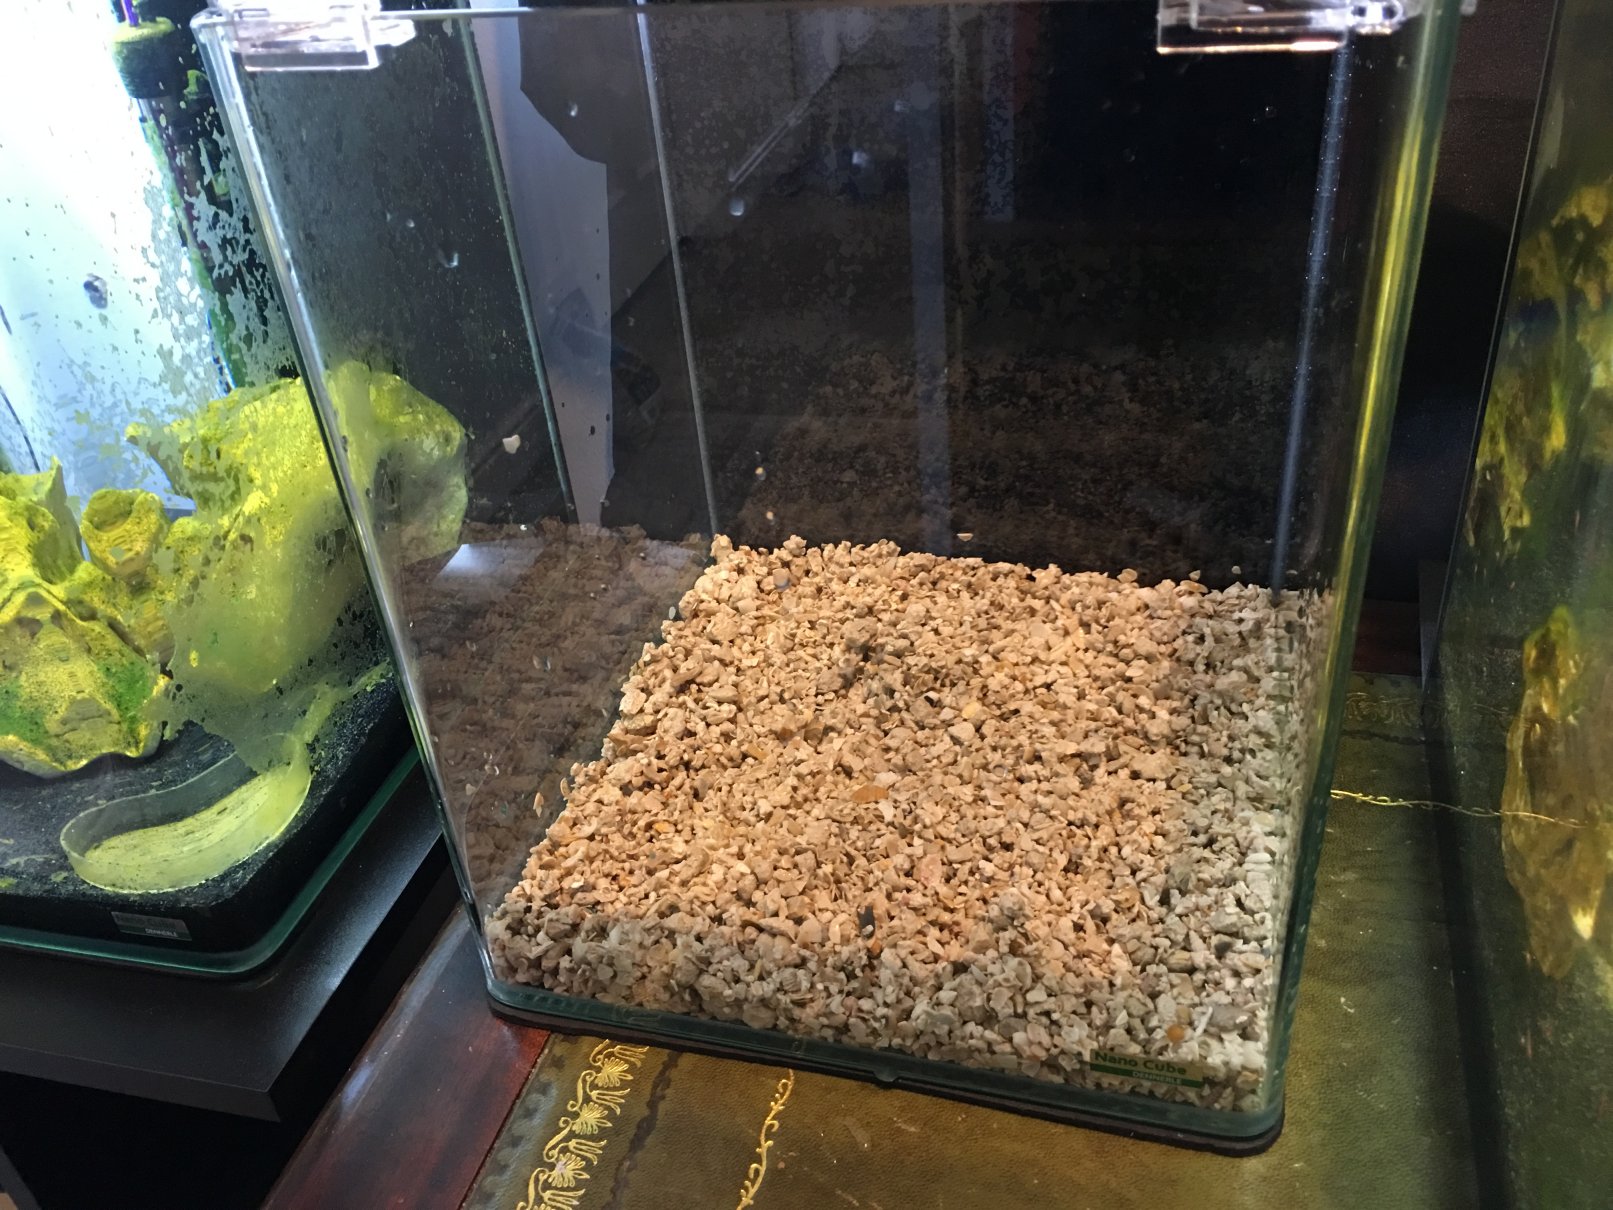
• SLOWLY and CAREFULLY add the washed substrate to your tanks base by hand and spread evenly, you don't need to compress it or apply pressure because this could crack your tank.
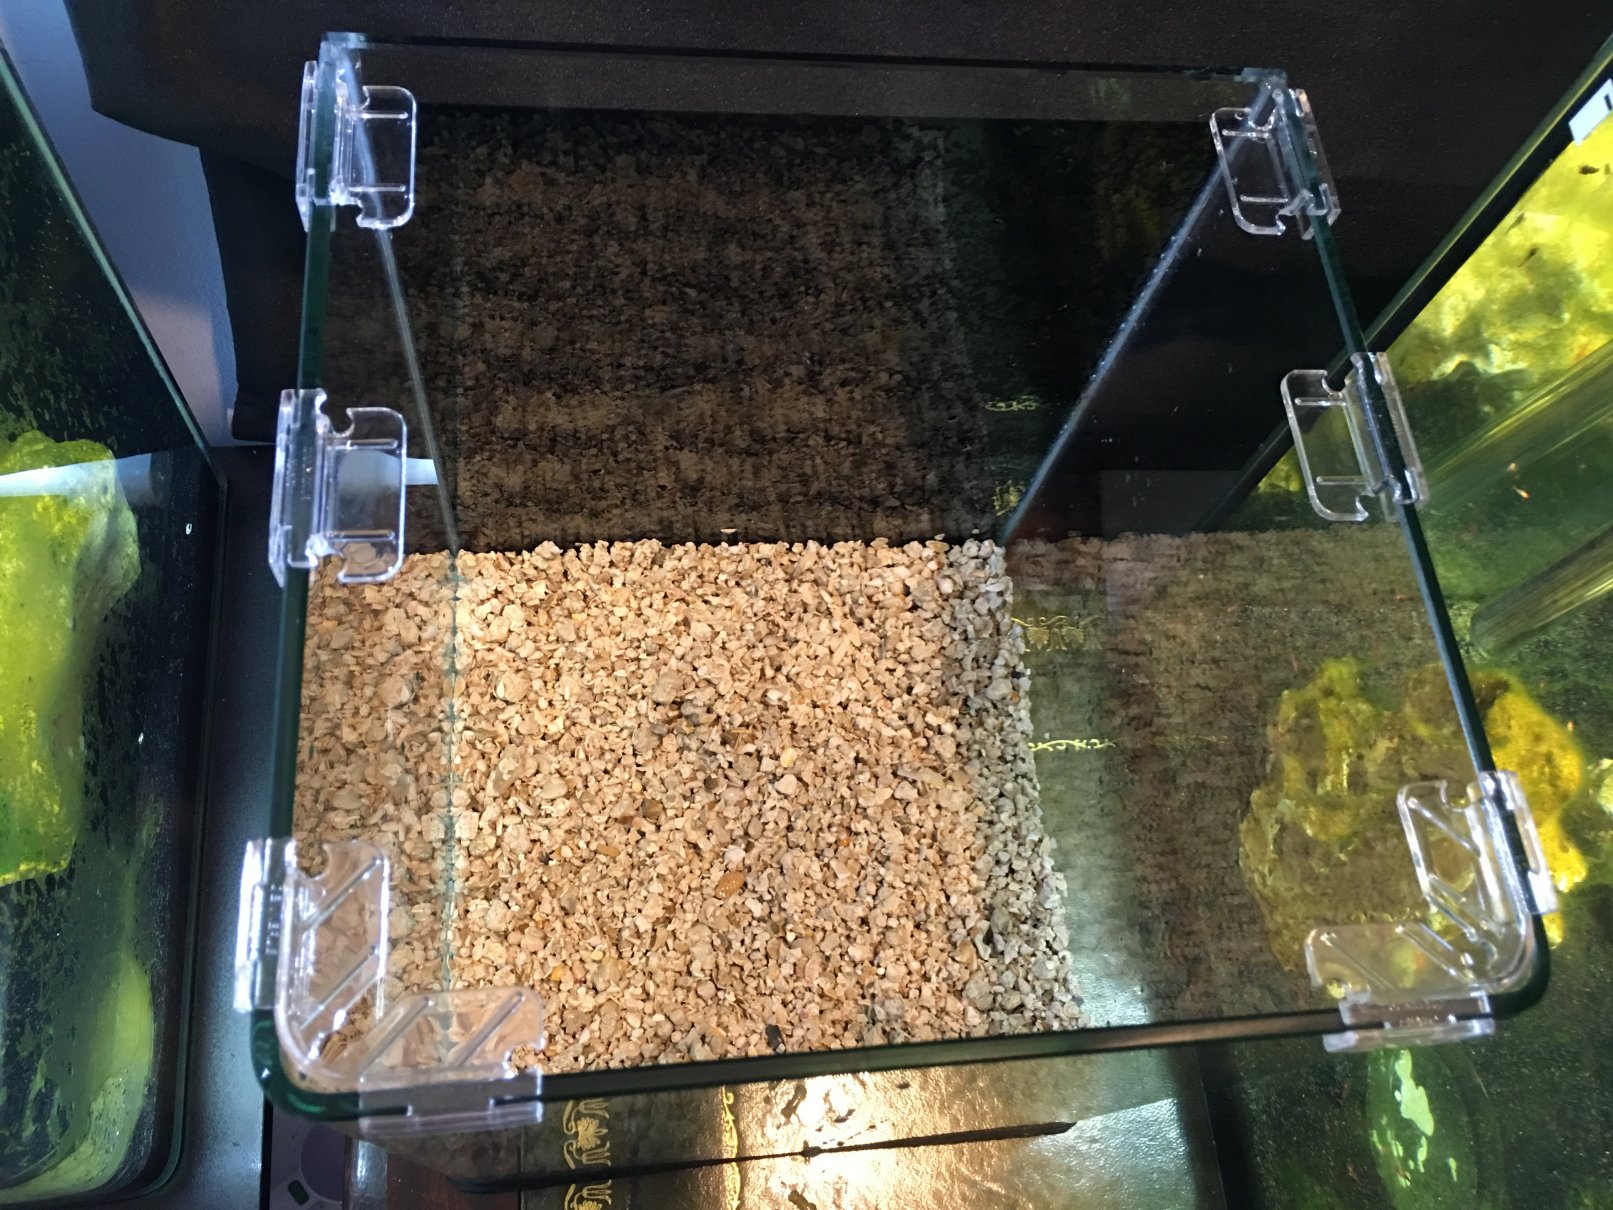
• Take your rocks or ornaments and complete the same steps as above in point 3. By now you should be seeing that anything that goes into the tank must be rinsed and cleaned in RO water prior to going into your tank, pour away the dirty water and goto the next step!
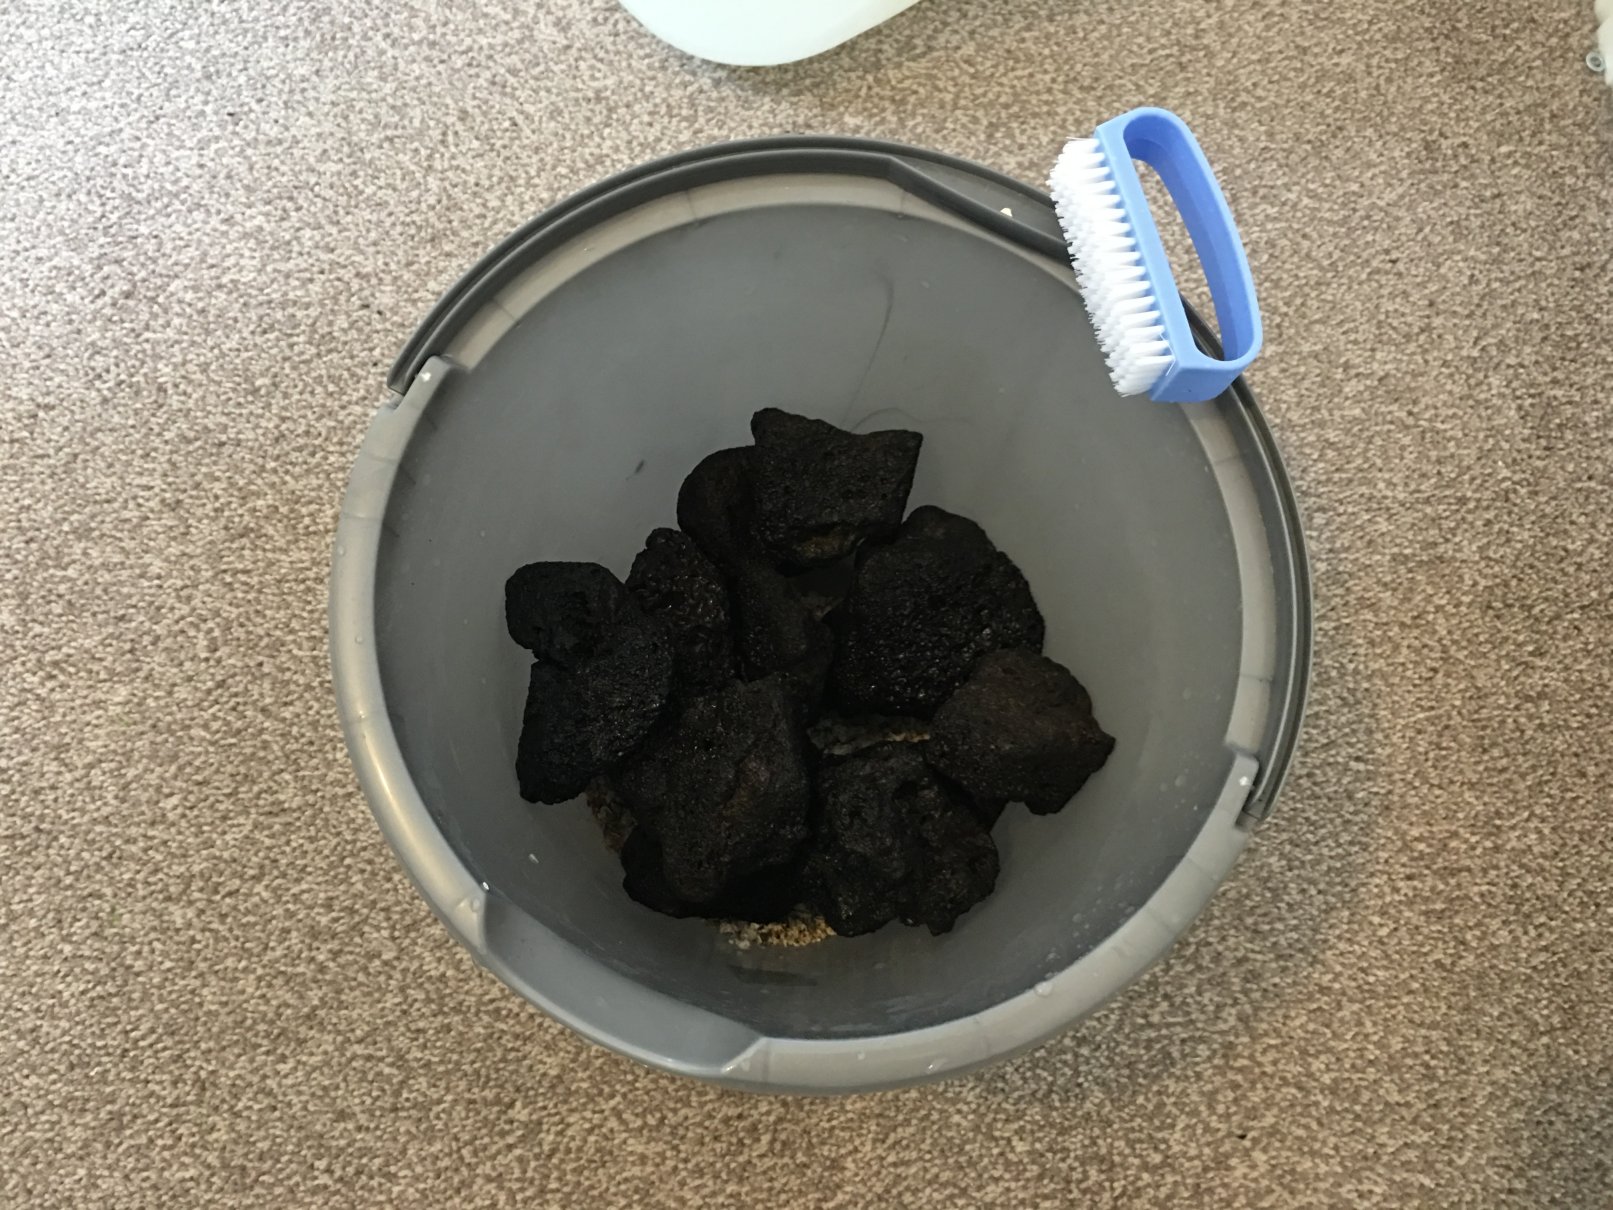
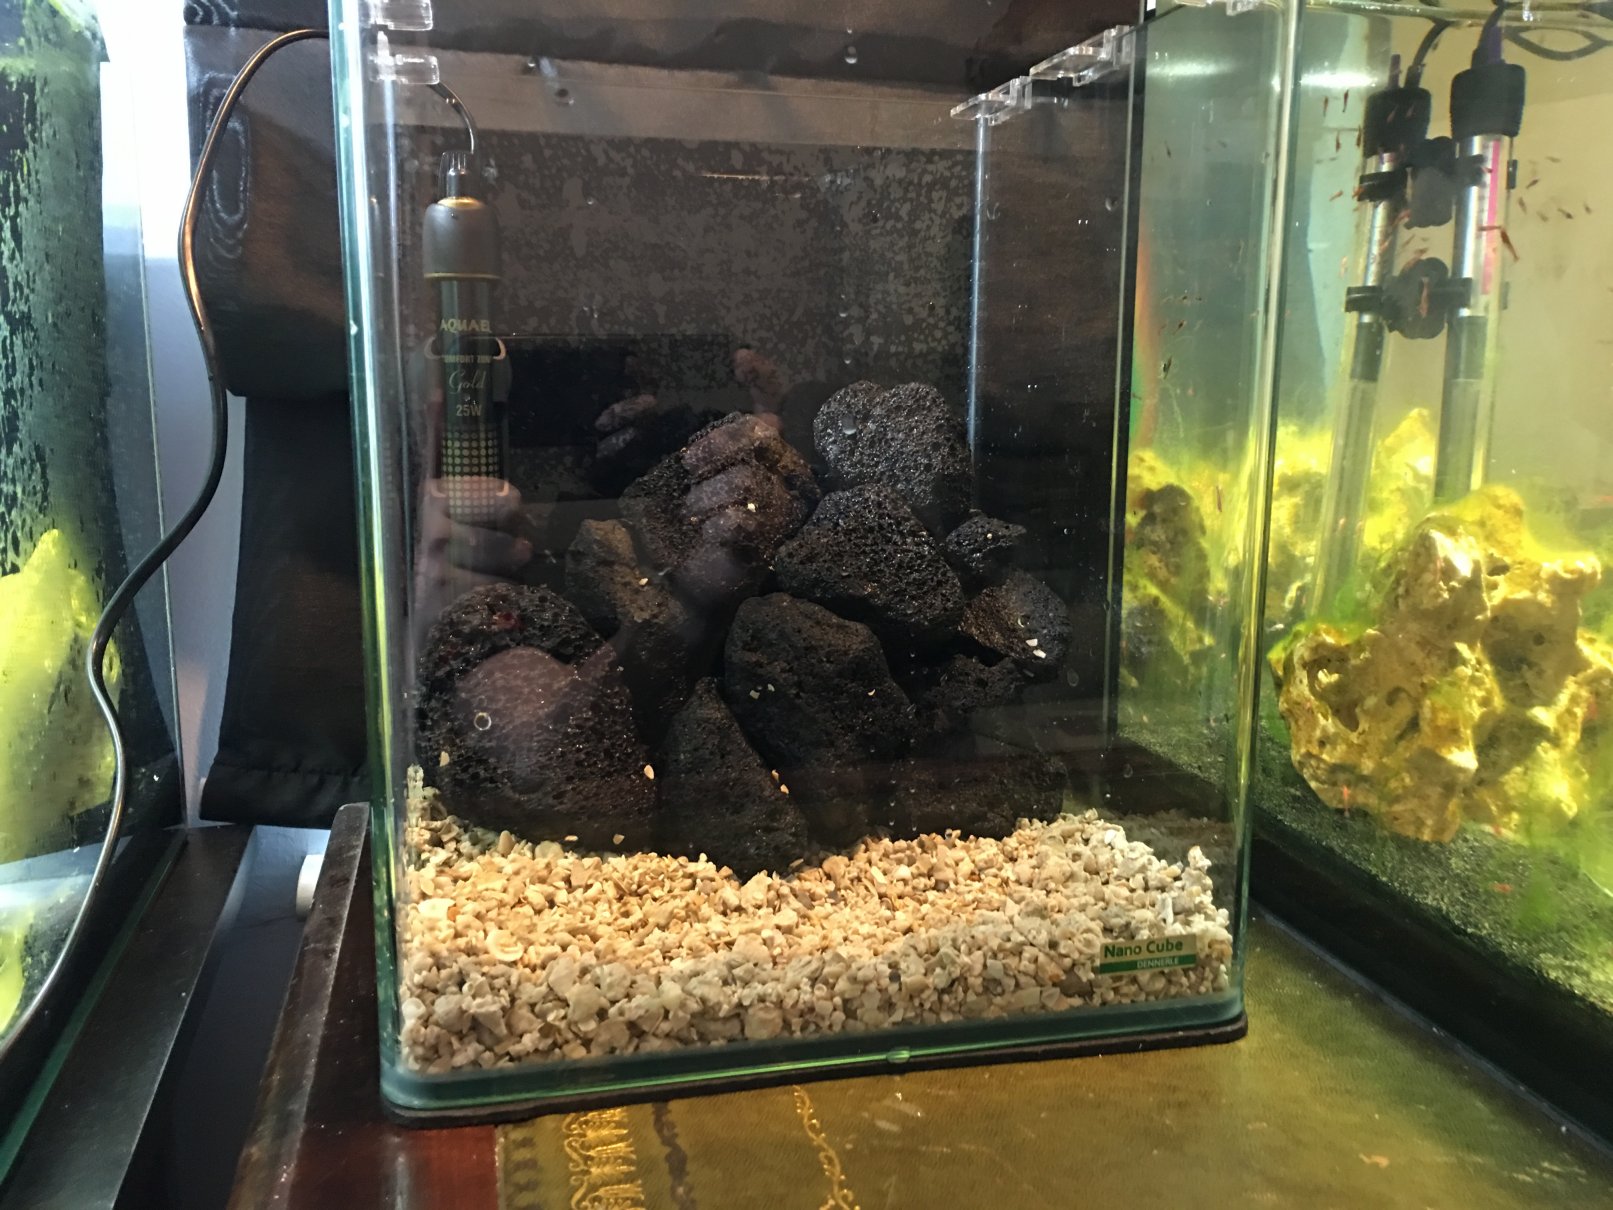
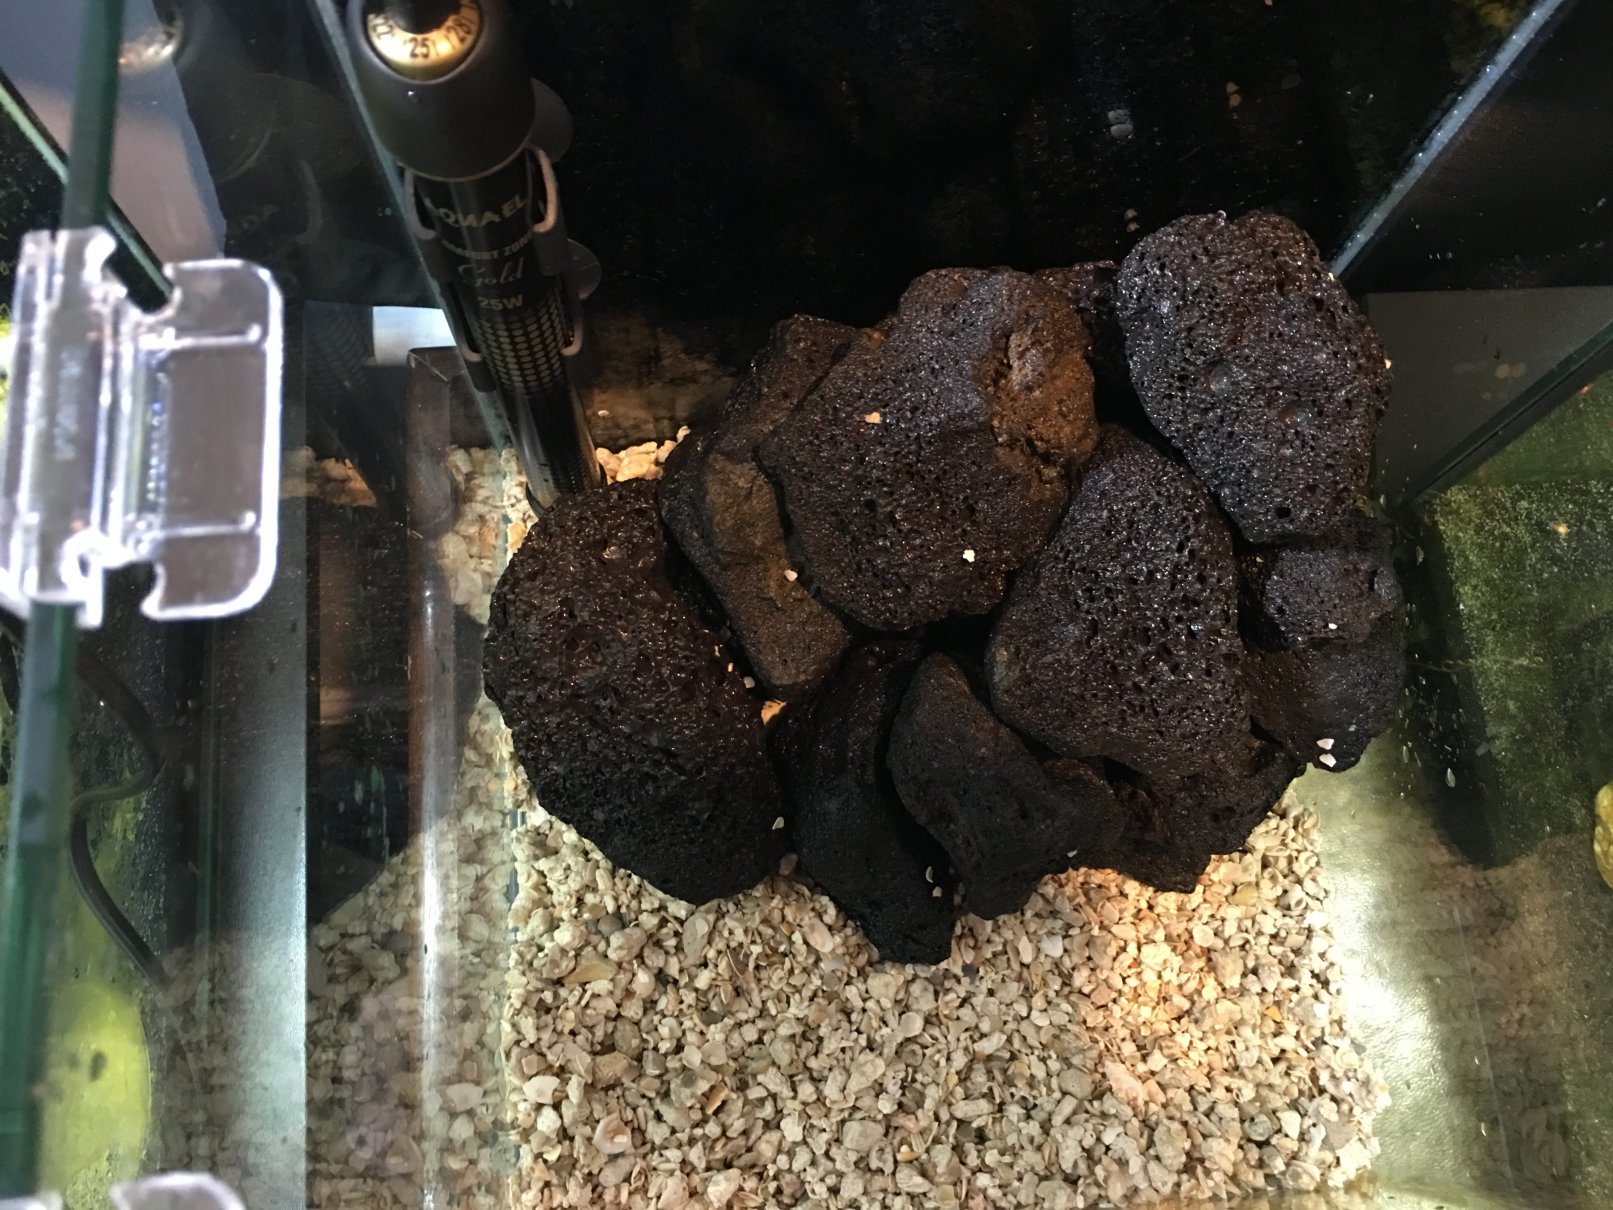
• Take your rocks and place them in your tank, I would advise you to make sure the rocks are not touching any of the glass in your tank (including the base) if you are going to stack them up high as this will apply alot of pressure to the glass and could crack or weaken the integrity of the tank (with nano tanks you dont really need to worry about this as you wont wont fit a HUGE amount of rock in the space provided). Make sure the rocks are set in the substrate where they will not rock over or sink lower into the substrate over time as this could trap and crush the shrimp (Don't push too hard downwards into the sand though!)
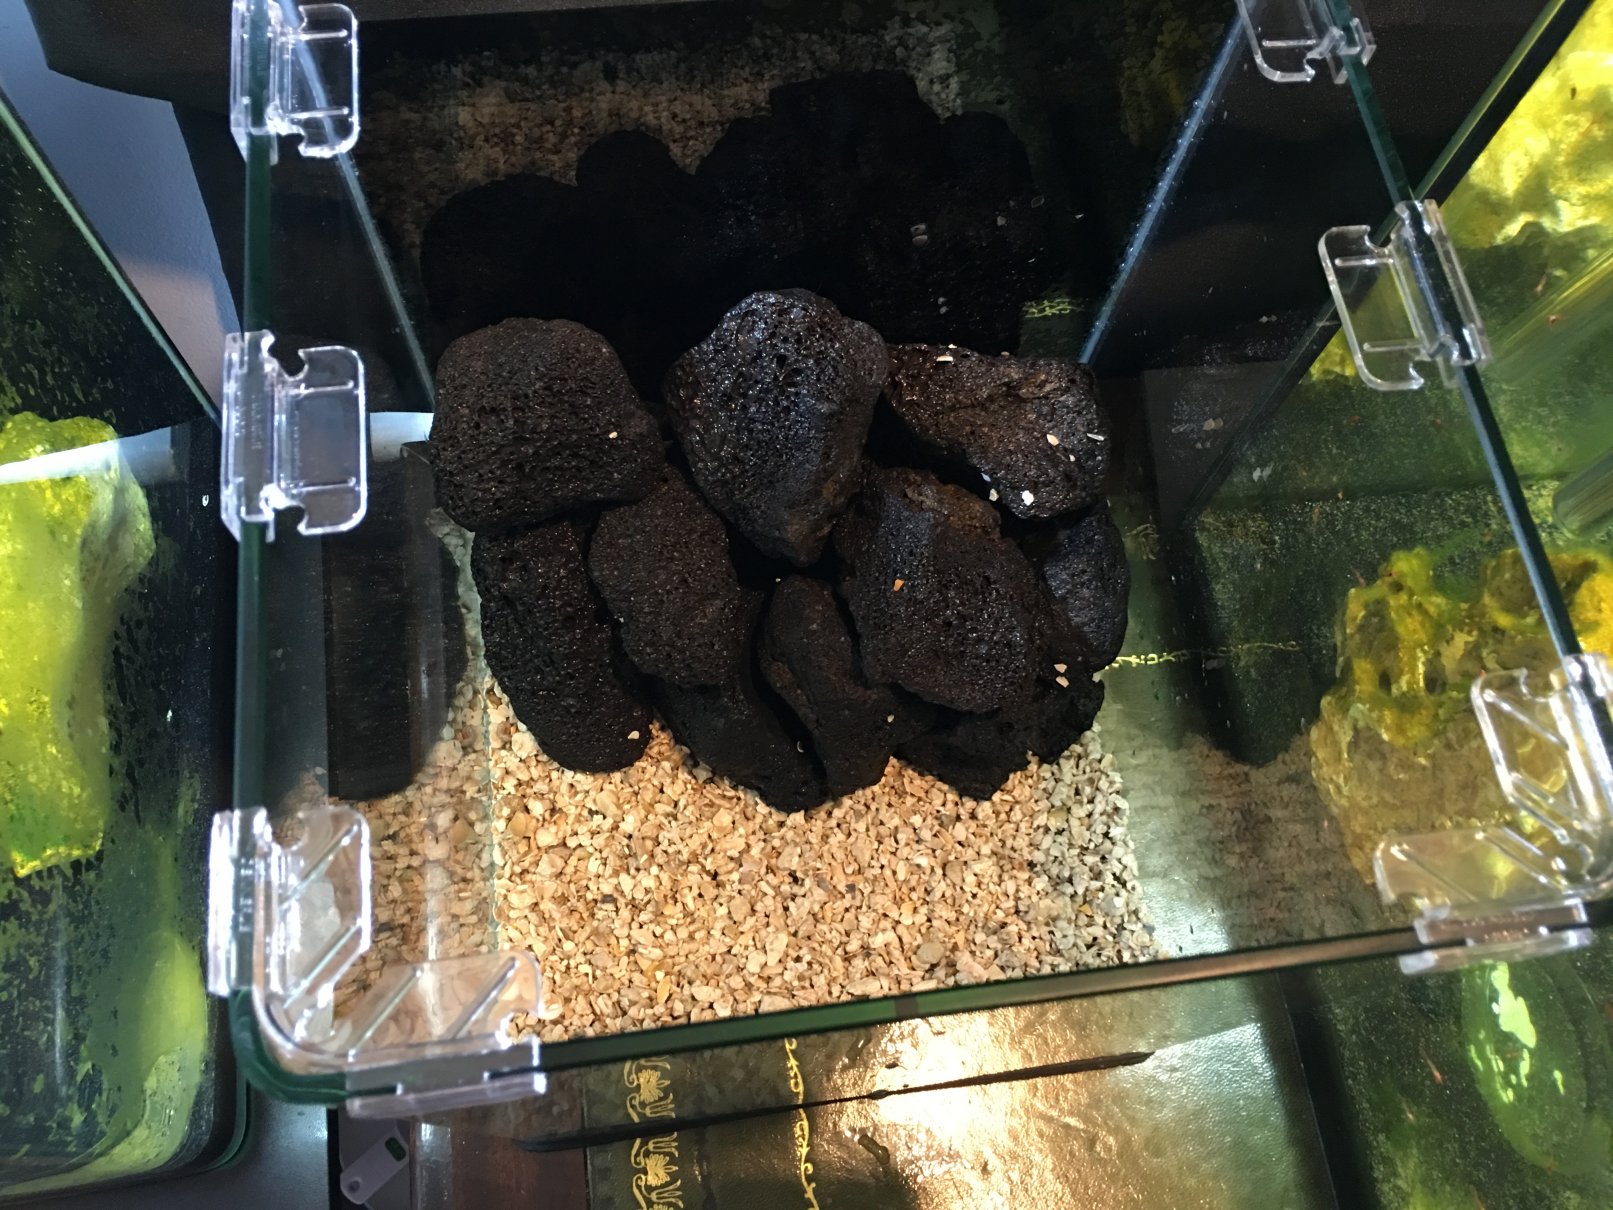
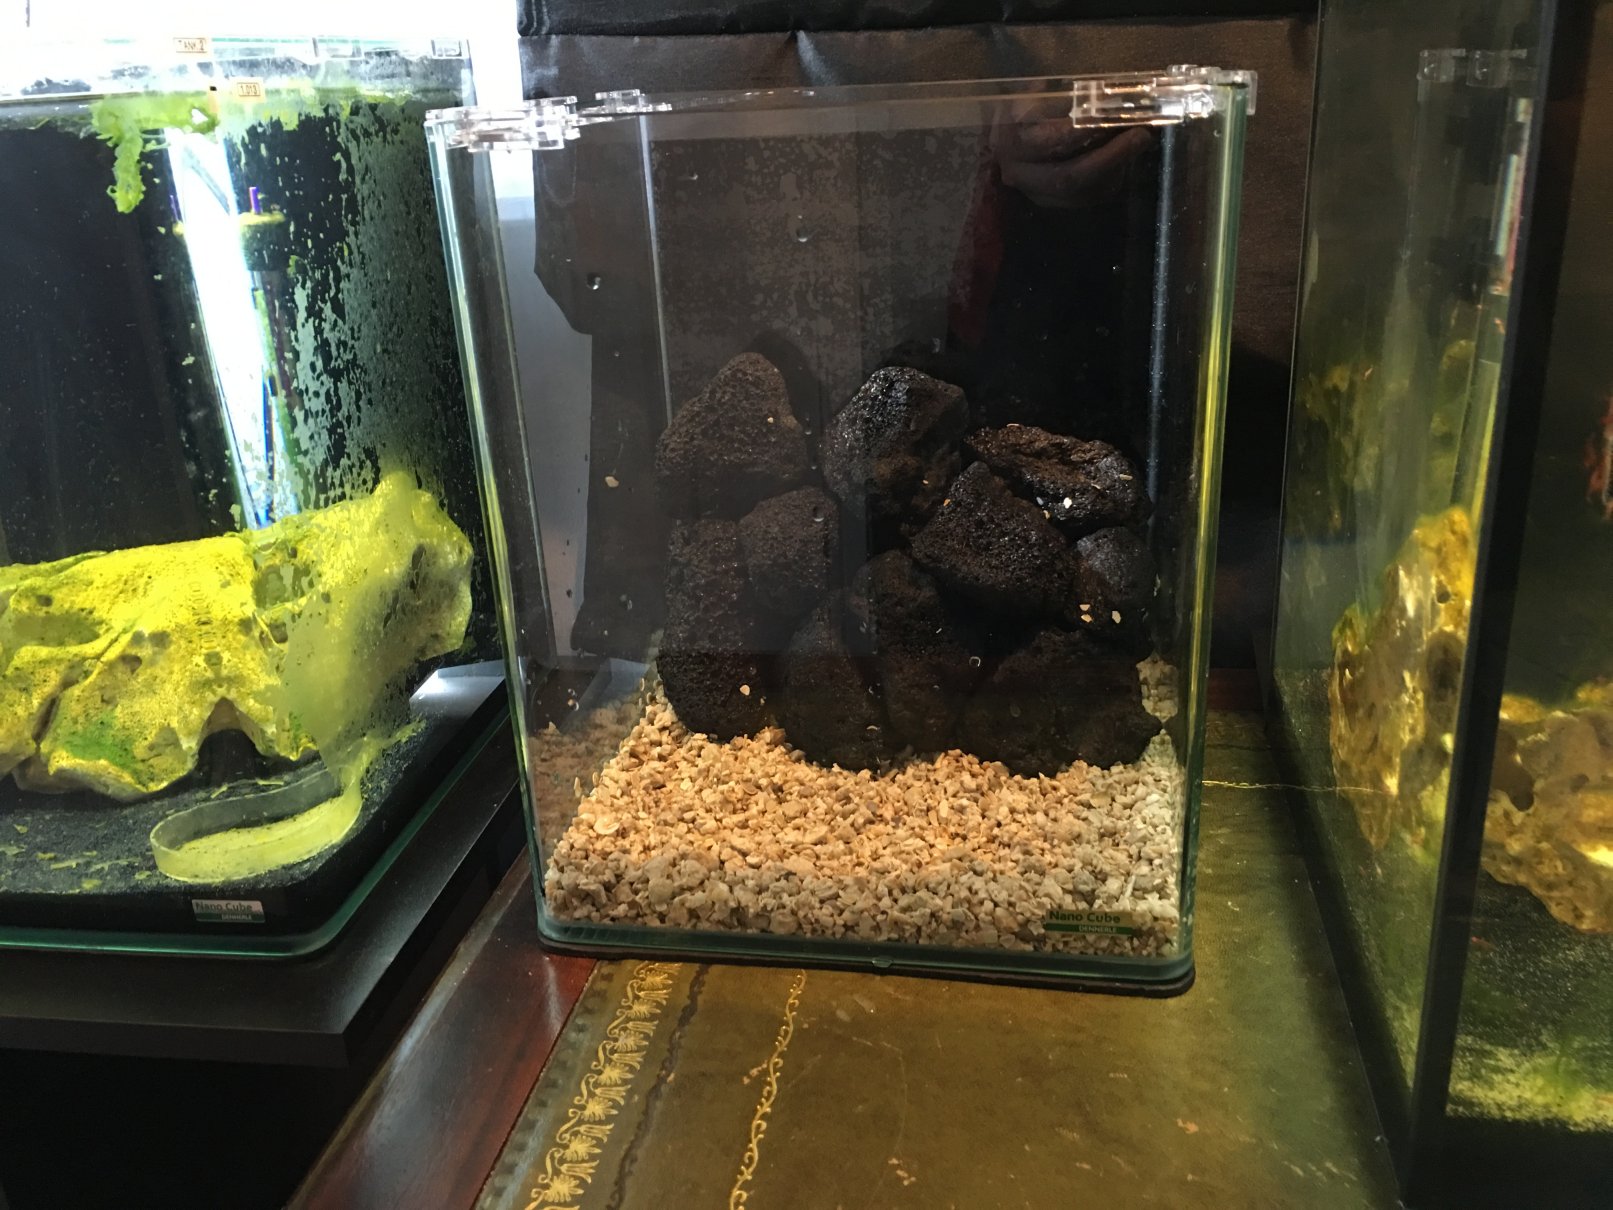
• After the addition of your rock scape, now is the best time to organise and arrange the rock layout to your liking and moving things around for the last time, be sure nothing is unstable or is in danger of moving once water is in the tank. You can also add your heater to the tank if you are going to use one, Take your heater and suction cups and give them a quick rinse/clean in some RO water, next add the heater to your tank which MUST be completely submerged with just the wire running out of the water, don't plug it in or switch it on until it is fully submerged. You can set the temperature of the heater by turning the dial on the top and watching the front display, this shows the temperature the heater is set to switch on and keep the tank water temperature stable to. As a general rule you may need to set the temperature a degree or 2 above what setting you want e.g. You are aiming for 20degree C water in the tank so set the heater too 21.5. This makes sure the water which is furthest away from the heater also stays at around 20 degrees C. If you don't compensate slightly you may notice the heater switching on and switching off again once it detects the water directly around it reaches 20 deg C but on the other end of the tank the water sits cooler thus avoiding cool spots.
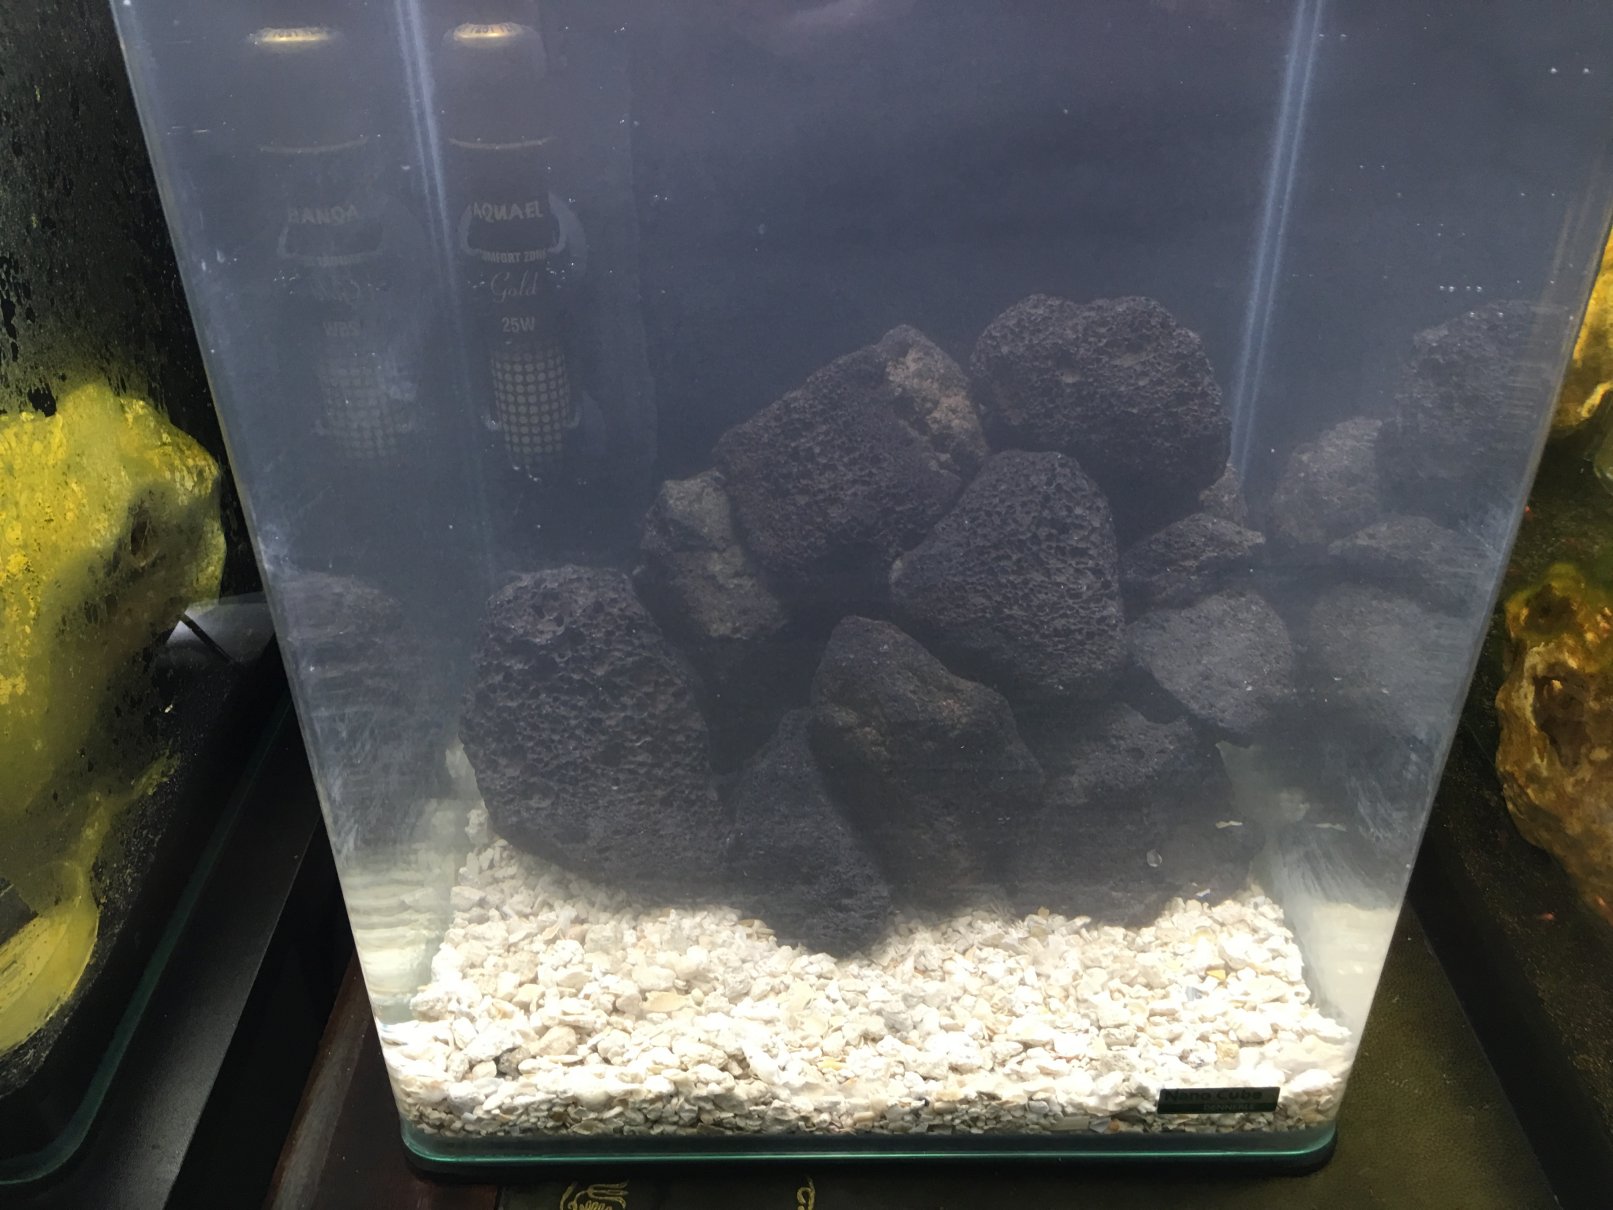
• Take your RO water and slowly pour it into the tank, I'd advise pouring into the sand and not onto your rocks as this may push them down too much. Don't worry about the sand moving as you can re arrange it after the tank is full, you can even add a plate or cup to the sand and pour the RO water directly onto it to deflect the splash caused thus keeping your substrate in place during the tank filling phase.
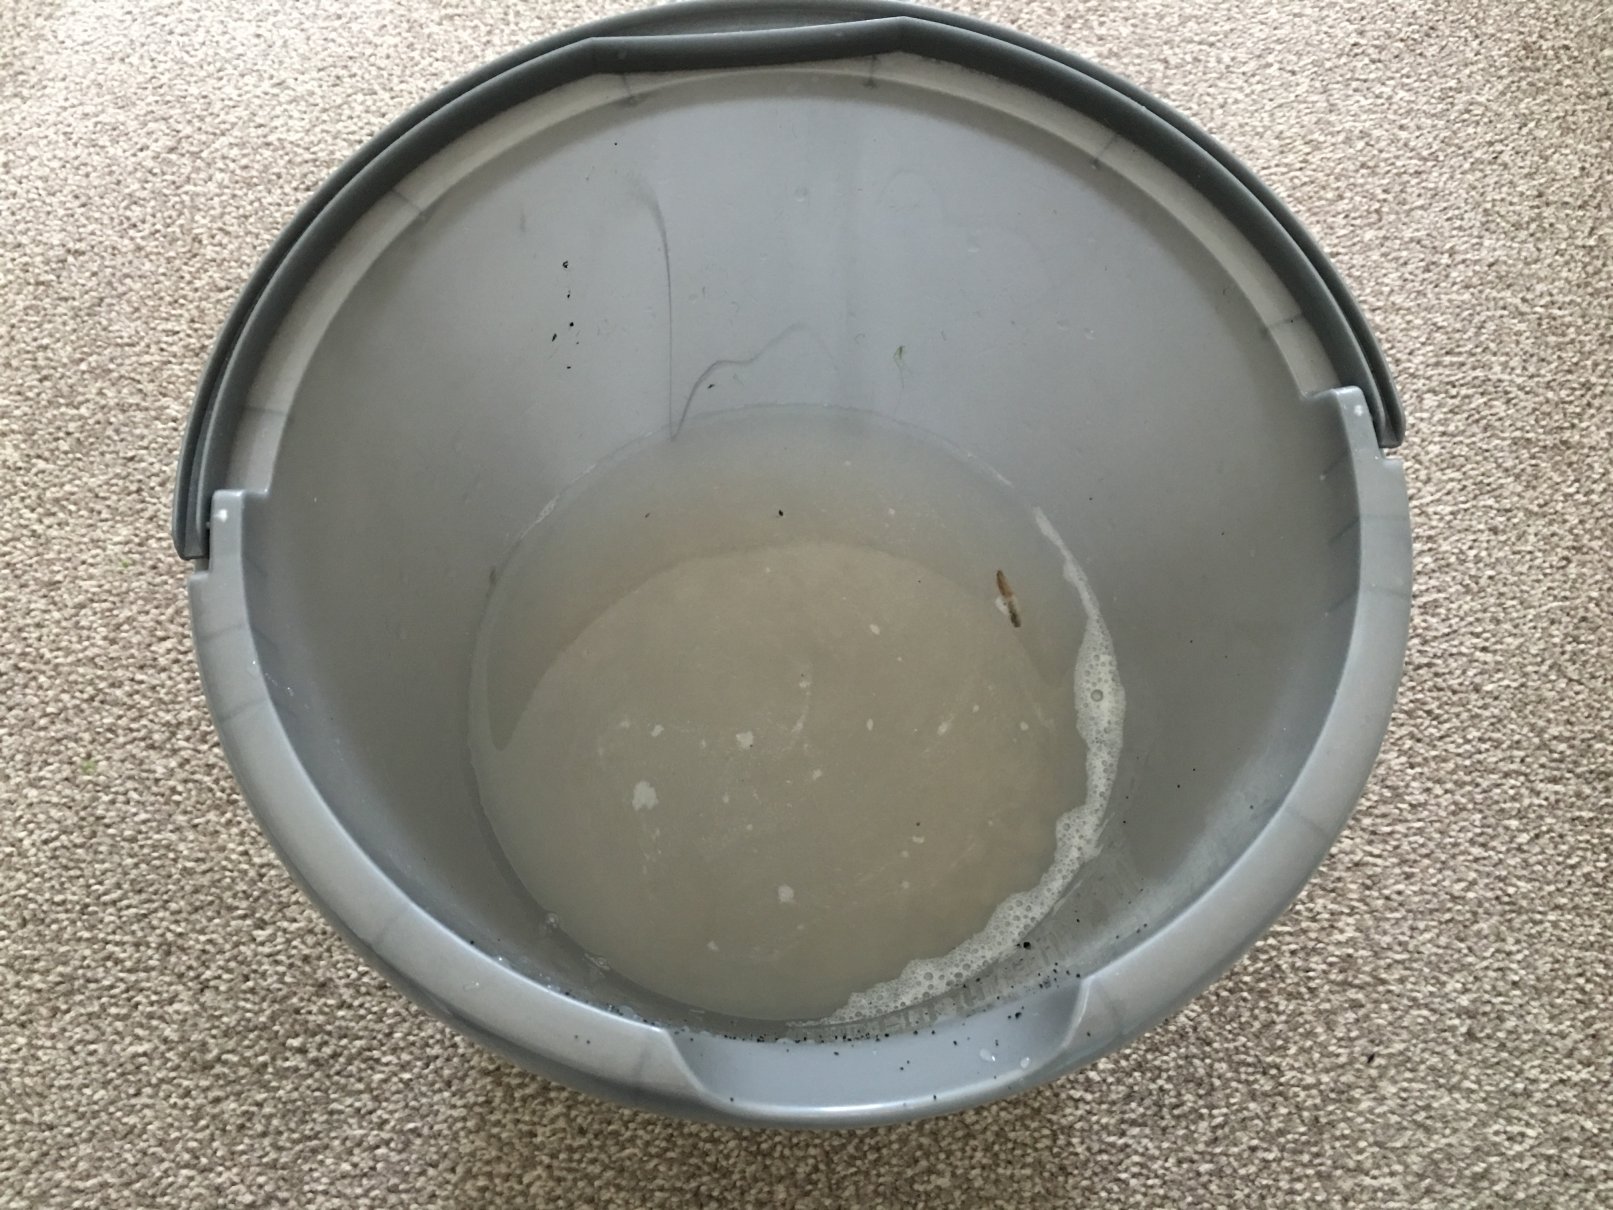
• Next take your packet of marine salt and check the back of the pack for the salt to water ratios, off the top of my head the Instant Ocean marine salt weighs in at 330grams per 10 litres of RO water to make marine salt water (1.020 SG) we want roughly just under half strength salt water to make brackish water.
• You can use the calculator below to input your tanks volume and required SG and it will tell you how many grams of salt to use. Or if you are feeling lucky you can guesstimate it and adjust later, we want a SG between 1.008 up to 1.015.
LINK: Online SG/Salinity calculator can be found here
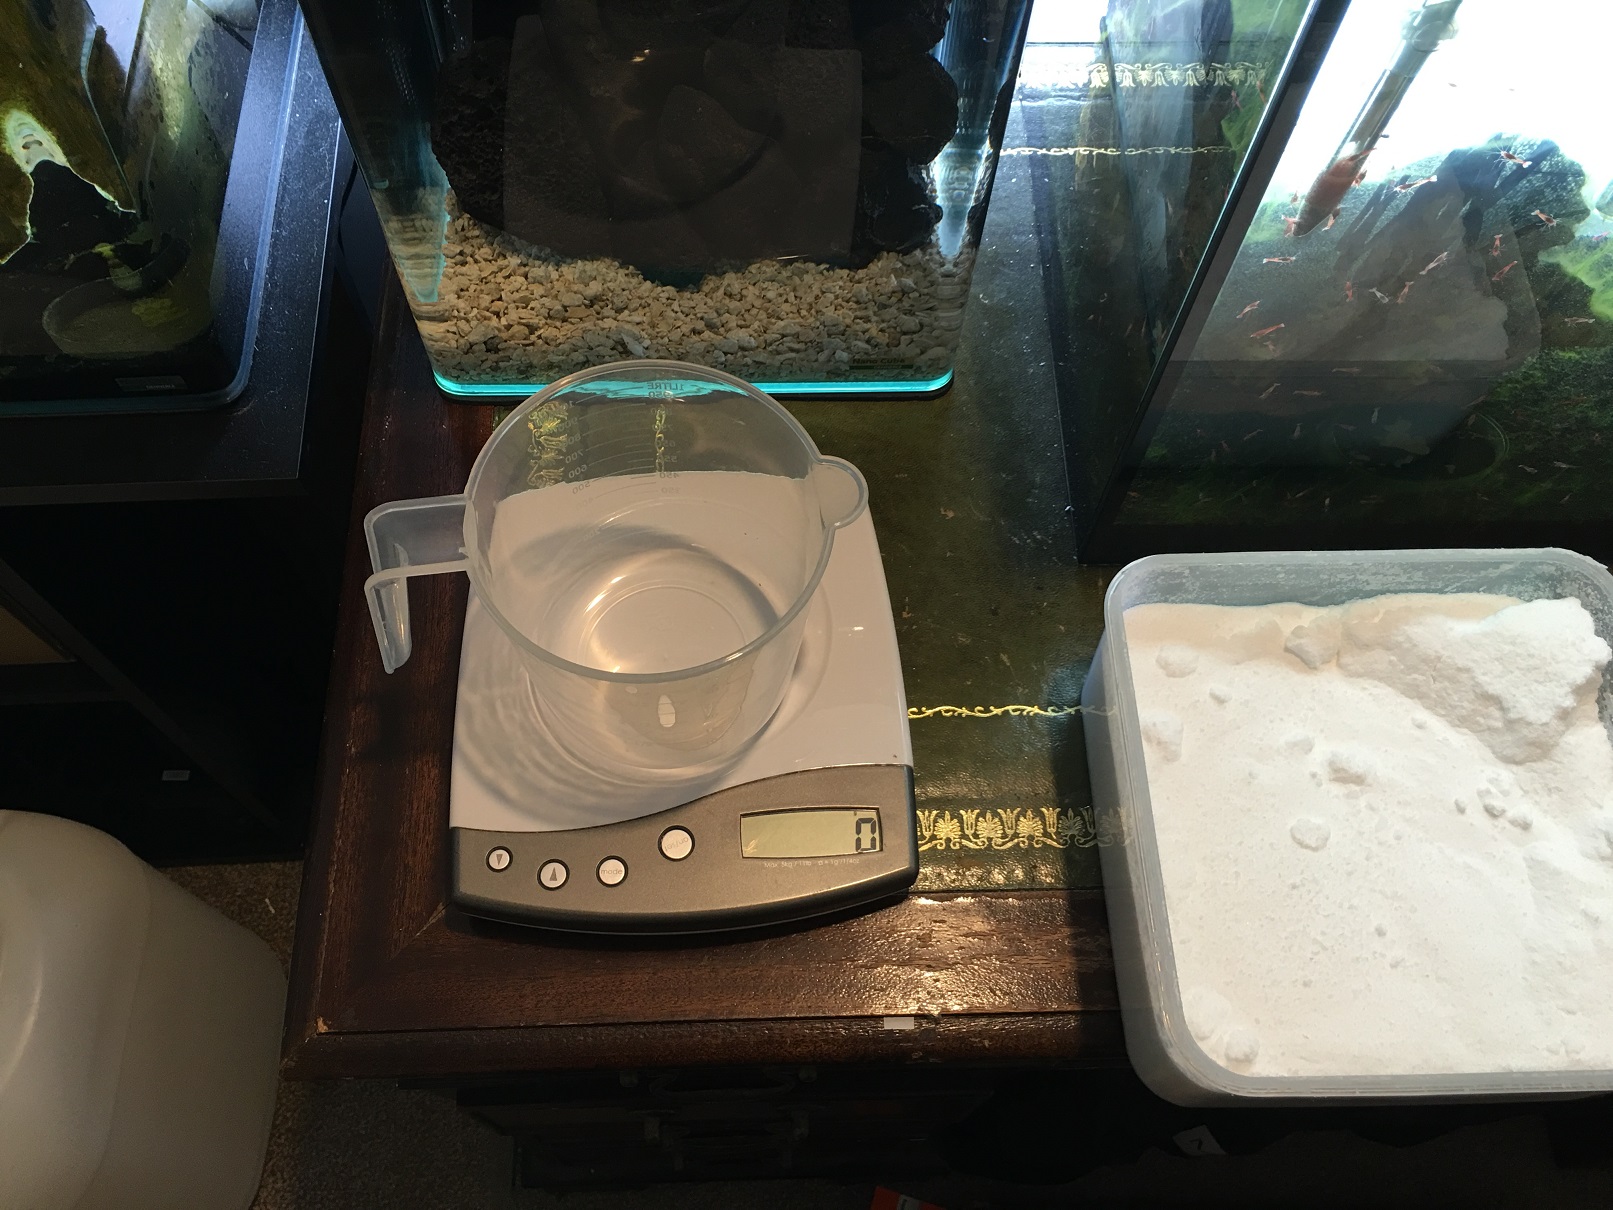
• If you are just going to roughly guess the salt quantity to make brackish water and are using Instant Ocean marine salt then I would take 10litres of RO water and add 170grams in weight (good starting point) of salt directly, mix it in by stirring the water and wait for it all to dissolve. If you are using a 20litre tank then add double the 170grams of salt (340grams) and so on, don't worry about the salt sitting on the bottom of your tank as it will dissolve on its own. You will need to tweak the results later so dont worry too much about getting it perfect at this stage.
*Please note that this is the only time you can add salt directly to the tank as you don't have shrimp/snails in there yet (direct salt contact can be very bad got tank life). In future you will need to mix the salt and water in a 10 litre bucket prior to adding it to your tank after all salt has dissolved.
• You can use the calculator below to input your tanks volume and required SG and it will tell you how many grams of salt to use. Or if you are feeling lucky you can guesstimate it and adjust later, we want a SG between 1.008 up to 1.015.
• If you are just going to roughly guess the salt quantity to make brackish water and are using Instant Ocean marine salt then I would take 10litres of RO water and add 170grams in weight (good starting point) of salt directly, mix it in by stirring the water and wait for it all to dissolve. If you are using a 20litre tank then add double the 170grams of salt (340grams) and so on, don't worry about the salt sitting on the bottom of your tank as it will dissolve on its own. You will need to tweak the results later so dont worry too much about getting it perfect at this stage.
*Please note that this is the only time you can add salt directly to the tank as you don't have shrimp/snails in there yet (direct salt contact can be very bad got tank life). In future you will need to mix the salt and water in a 10 litre bucket prior to adding it to your tank after all salt has dissolved.
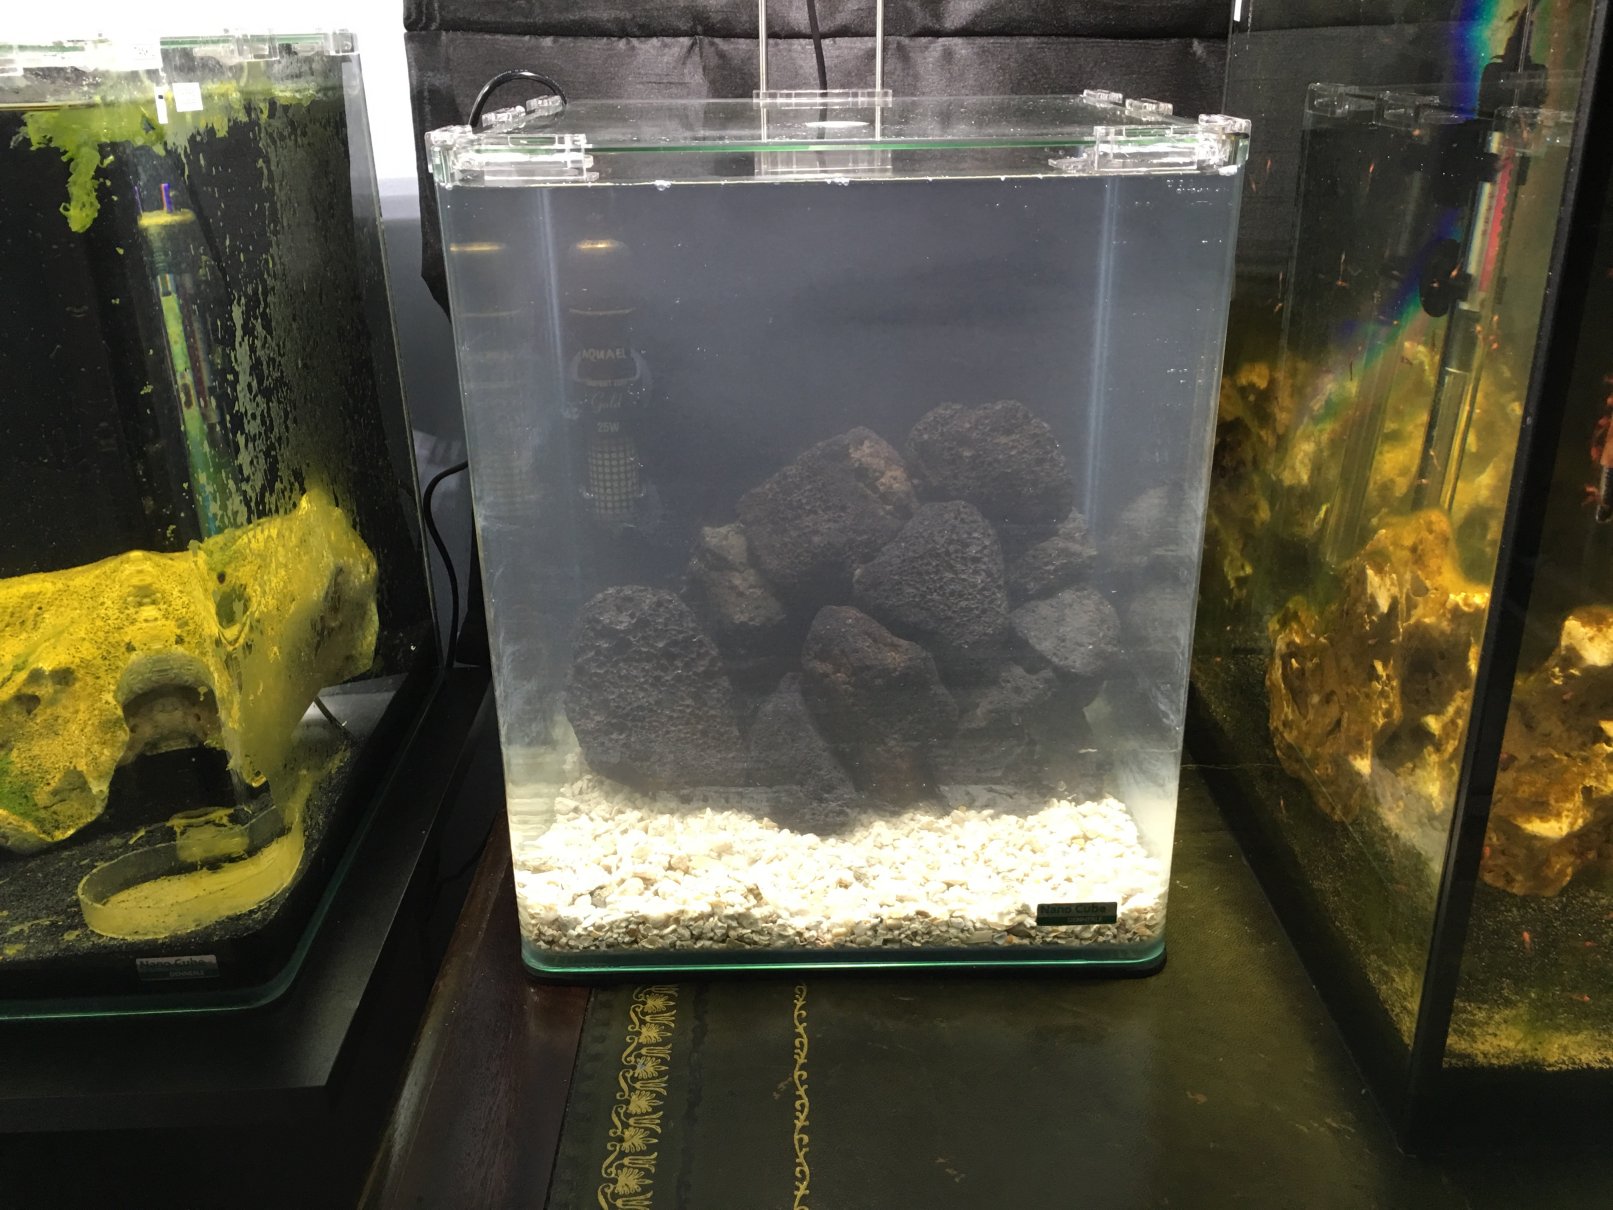
• Next step is too add your lights (if you haven't already) and tank lid, leave the lights on and let the tank settle. We are waiting for the salt to completely dissolve and the water to get to the correct temperature for a day or so before we measure the SG/Salinity of the salt water. *note: the reason we wait for the tank water to reach the set temperature before measuring the SG is because cold salt water will give you a different reading to warm salt water, being brackish water, in theory doesn't matter if it's slightly under or over which you aim for but I like to do a job correctly :)
• Take your hydrometer or refractometer and place a sample of your tank water on the device to take a reading of your current SG/Salinity, as stated above you really want a SG/Salinity reading between 1.008 and 1.015 so if you are under or over this you may need to add more salt to raise the SG or remove a few glasses of your tanks brackish water and replace with pure RO to dilute the salt content. If you do alter the water re-measure with your meter again, if changes are needed beyond this then rinse and repeat until you have perfect brackish water for Opae ula shrimp.
The above 2 photos are examples of how a Refractometer and Hydrometer will display your waters SG/Salinity. (the SG/Salinity shown above isnt the required level needed for brackish water but merely an illustration)
The above 2 photos are examples of how a Refractometer and Hydrometer will display your waters SG/Salinity. (the SG/Salinity shown above isnt the required level needed for brackish water but merely an illustration)
• Its important to switch your lights on for 12 hours a day and off for 12 hours to promote algae growth, but not an excessive amount as it can look unsightly. This algae and biofilm grown is the food for the Opae ula shrimp! You can use a timer on your light's plug socket to switch it on and off automatically to avoid over or under exposure from forgetting to manually switch the light on or off . Usually it will take a month to 2 months for your tank to cycle, grow algae and contain all the beneficial bacteria needed in the water to keep the tank healthy.

• While your tank is 'maturing' the water in your tank is going to go through a few different stages which are all part of the nitrogen cycle, you can see if the cycle has completed sucesfully by using a water test kit on your tanks water when you start to get some brown or green algae growth. A zero Ammonia, Nitrite and a Nitrate reading of 10ppm or below is required and if so the cycle is complete and you may introduce some Opae ula shrimp and snails to your tank!
• You can speed up the cycle process by adding matured Opae ula tank water, algae or substrate from another keepers tank which will reduce the the wait by roughly 50%, but you may still have to wait for signs of algae to show up in the tank prior to adding shrimp.
• You can read more about the Nitrogen cycle and tank cycling HERE
• If you dont have a water testing kit then all you need to do is wait for brown or green algae to start growing in your tank and once this stage is achieved then it is time to add you Opae ula shrimp and snails as there is a *decent* chance the cycle is complete and all is well.